Digital Photography is a course for students who have little to no prior experience in photography. Foundational camera and Photoshop techniques, portfolio development, and artistic inquiry are taught in this course. Entering work into art competitions and exhibitions is encouraged. Upon completion of this course, students may opt to take Digital Photography 2, Graphic Design, or Multimedia.
Upon completion of the course, the student should be able to: (Essential Learning Goals)
· Explore design elements, technical quality, and conceptual concerns at a beginning level.
· Understand and operate camera functions.
· Understand and operate Photoshop and iPhoto.
· Understand the Mac computer interface.
· Understand import, export, and file management operations.
· Understand basic print production and display options for digital images.
· Develop students into critical thinkers that can analyze and interpret their artwork and the artwork of others.
· Investigate works of art by artists and the visual problems they address.
· Create artwork that shows evolving thought and beginning mastery of the medium.
· Use decision-making skills to plan artwork and apply the correct techniques to create the work.
· Start to develop a style or voice that is unique to the individual student.
· Express ideas about art using visual, verbal, and written forms of communication.
· Demonstrate behaviors that reflect the habits of professional artists.
Timeline and daily goals
Week 1 : August 20-24
| composition_in_photography.pdf |

Welcome to Photo 1!
This first few days we will be getting to know each other, but we will start using this website later in the week.
This first few days we will be getting to know each other, but we will start using this website later in the week.
AUGUST 21
Getting to know one another, games and introductions!
Connection circle:
Getting to know one another, games and introductions!
Connection circle:
- Share a musician, band, artist who has been influential/inspiring to you. Why did you choose this artist?
Goal: Students will share what they know and start learning about how the class is run.
1. Using the student account....
- code u9ouqxa 8th PERIOD
2. Review the two assignments and complete
August 22
1. Using the student account....
- Join our Google Classroom
- code u9ouqxa 8th PERIOD
2. Review the two assignments and complete
- Complete the short answer question
- (Time permitted) Complete the Photo Analysis form
August 22
Goal for today: Students will share information about themselves and the types of photography they are drawn to by creating a visual presentation in google classroom - Please save your slides with your first initial and last name.
In class today:
Pinterest is a great place to start to find photography inspiration! Use the search bar and type in different things such as:
In class today:
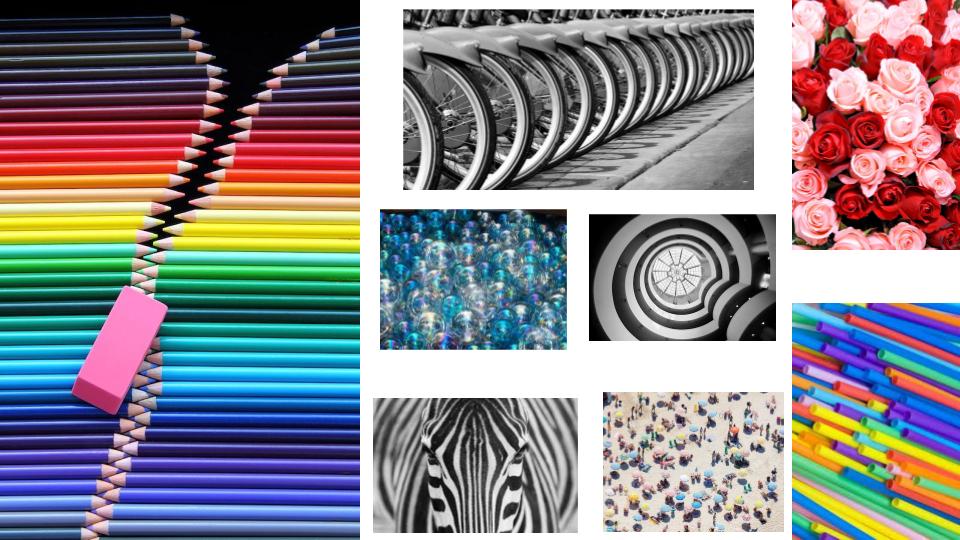
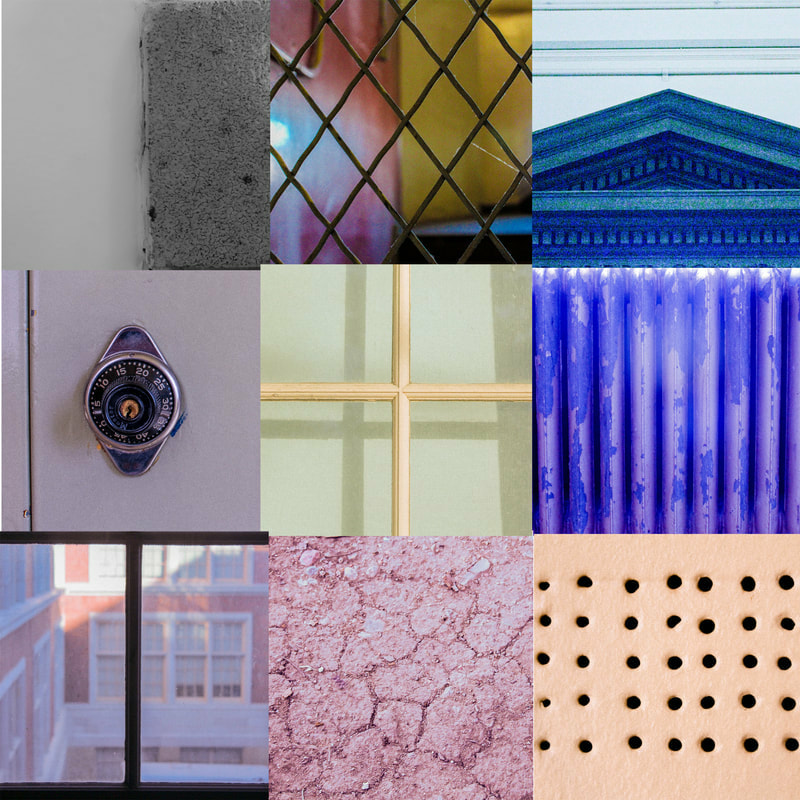
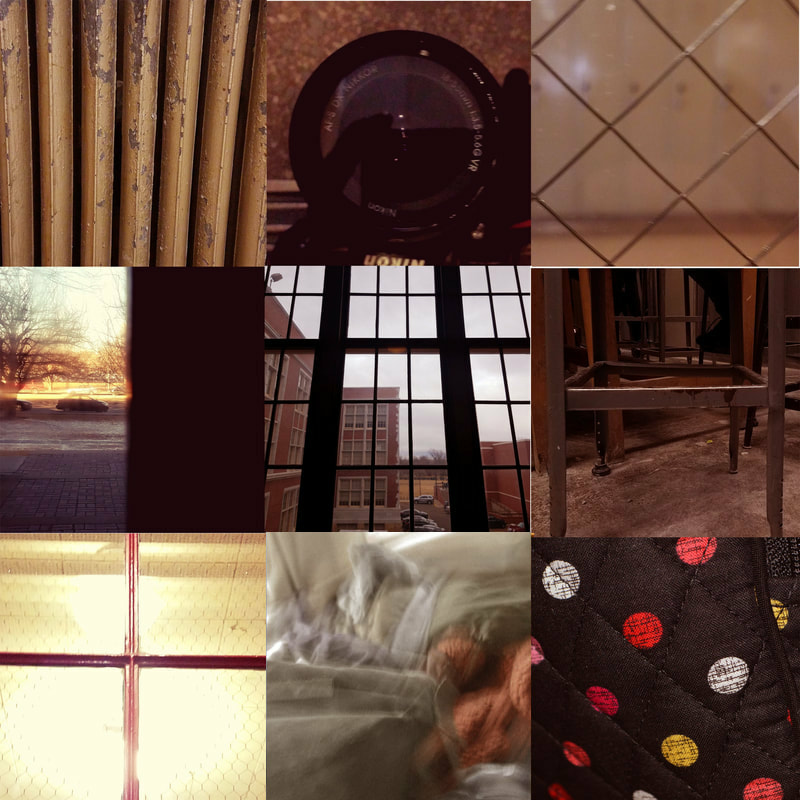
- You will be making a Google Slide Show with only 2 slides.
- Each slide must have a minimum of 9 images. You can add more than 9 if you want to.
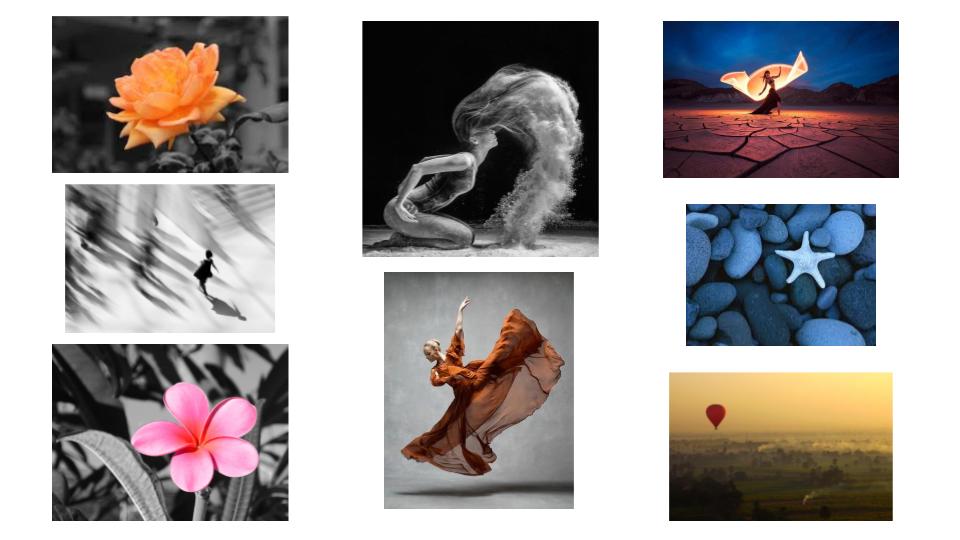
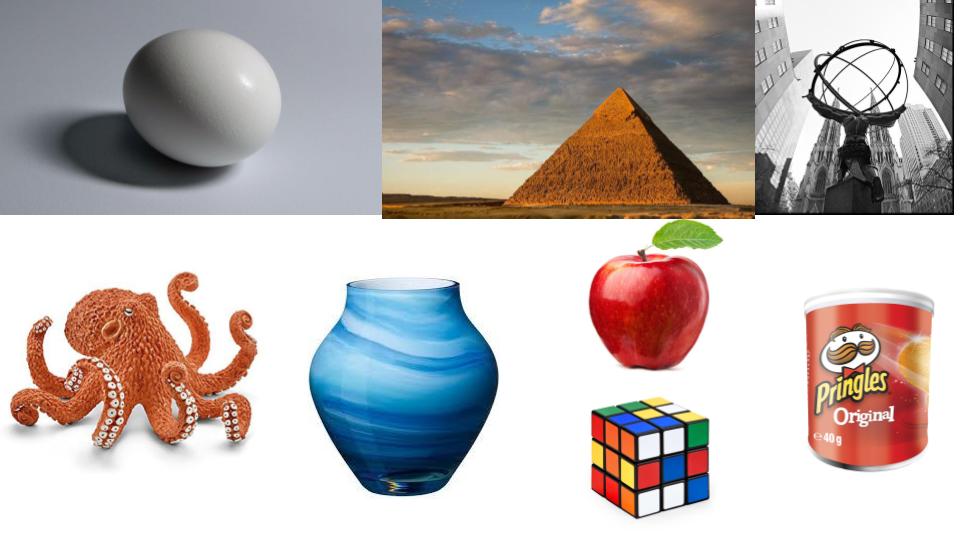
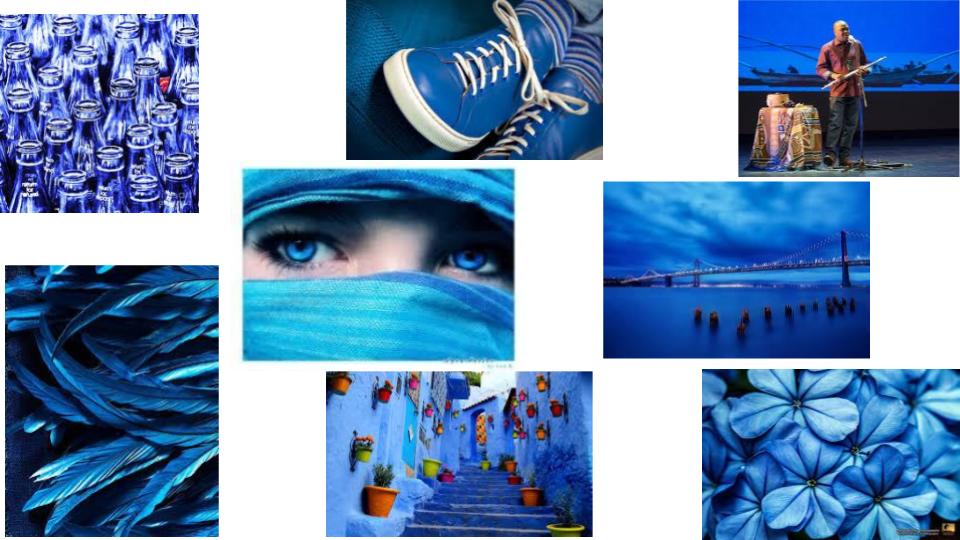
- Slide 1: Collect images that represent you. Your interests, favorite music, hobbies, sports, family, friends, whatever you want. You do not have to include actual photos of yourself, friends, or family.
- Slide 2: Collect images of photography that you like or that inspires you.
Pinterest is a great place to start to find photography inspiration! Use the search bar and type in different things such as:
- Journalism photography
- Photography Inspiration
- Creative photography
- Conceptual photography
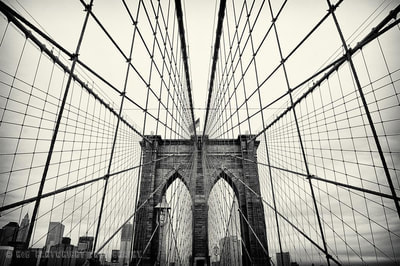
- Architectural photography
- Sports photography
- Landscape photography
- Fashion photography
- Emotional photography
- Travel photography
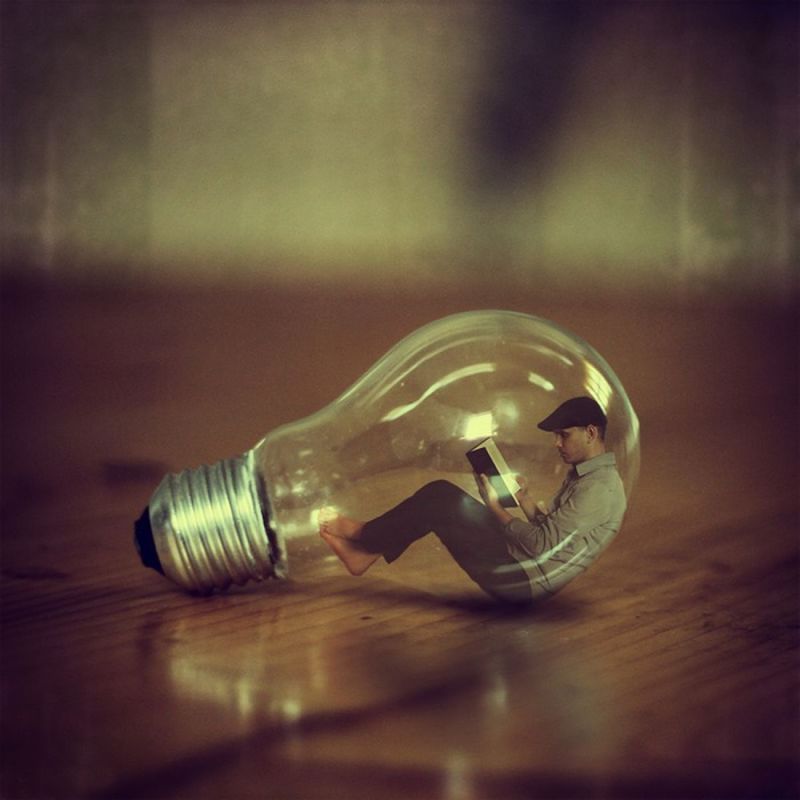
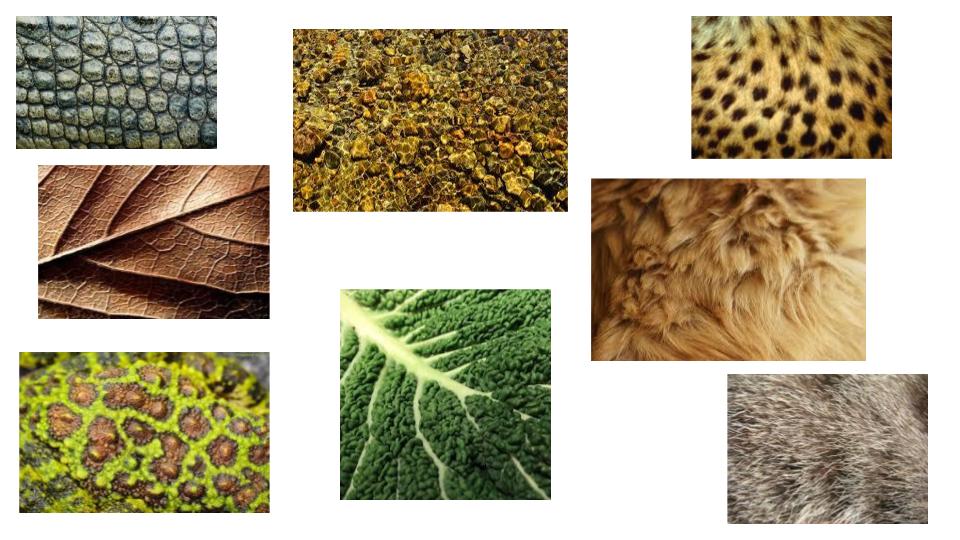
Example Google slides below.
(My interests on the left, photography inspiration on the right)
(My interests on the left, photography inspiration on the right)

|

|
August 23
Review class syllabus and class expectations
Class syllabus needs to be signed and returned to me by Monday, August 27th! (After that I may hunt you down)
Review class syllabus and class expectations
Class syllabus needs to be signed and returned to me by Monday, August 27th! (After that I may hunt you down)
| bakersyllabus_slip_photo.docx |
Goal(s) for today:
1. Students will complete and submit their google slide show on google classroom: one slide with personal interests, one slide with photography they like/find interesting. Again, Please save your slides with your first initial and last name.
1. Students will complete and submit their google slide show on google classroom: one slide with personal interests, one slide with photography they like/find interesting. Again, Please save your slides with your first initial and last name.
2. For students who submit their slides before the end of class: Please review the 'Basic Photo Editing Terms' and answer the multiple choice questions attached to the assignment to receive credit.
3. (Time permitted) - Watch the tutorials on 'cropping and straightening a photo to improve composition', and 'improving contrast and brightness in a photo' ( We will reflect on these next week on google classroom )
3. (Time permitted) - Watch the tutorials on 'cropping and straightening a photo to improve composition', and 'improving contrast and brightness in a photo' ( We will reflect on these next week on google classroom )
TOMORROW: You will shoot your first assignment - make sure your cell phone is charged and ready or bring your camera!

|
August 24
GOAL: Students will demonstrate their CURRENT level of understanding the concepts of photography by shooting 30 images in 30 minutes. 30 in 30 Project You will take 30 photos in 30 minutes around the school. This is to demonstrate your current level of understanding about image making. The "non-negotiable"
After you take your photos
|
Week 2 : August 27-31

August 27 -28 Syllabus due!
GOAL: Students will be able to upload and download their images, create a contact sheet, and start the basic editing process in Photoshop. (Listening & Speaking)
** PLEASE MAKE SURE YOU ARE ALL CAUGHT UP WITH ASSIGNMENTS ON GOOGLE CLASSROOM (SOME STILL NEED TO REVIEW PHOTO EDITING BASICS AND ANSWER QUESTIONS)
Upload/Download Images
Make sure all your images are in your Drive
Create a folder on your desktop - label as "Name 30 in 30"
Place your downloaded images into this folder
Making a contact sheet
- Open Photoshop`
- File>Automate>Contact Sheet II
- Choose your folder (Name 30 in 30)
- Adjust options if neccessary
- Press OK
- Save as name_30in30_cs.jpg, and save it to your desktop
- Under 'JPEG OPTIONS', be sure to set the quality to 'low' and click 'ok' (otherwise the file will be too big)
- Upload your contact sheet onto your google drive
Choose your best image
Looking at your contact sheet, choose ONE image to edit (what makes a good photo?)
Edit Your Photo
- Open the file in Photoshop
- Using the top menu...
- Levels (adjust exposure)
- Color or Hue/Saturation (adjust color)
- Unsharp Mask (Filter>Unsharp Mask)
- Save as "30in30_name.jpg" on your desktop
- Under 'JPEG OPTIONS', be sure to set the quality to 'low' and click 'ok' (otherwise the file will be too big)
- Upload your edited photo onto your google drive
Reflection
In a Google doc, answer the following questions:
- What makes a strong photograph?
- Why did you choose this particular image? What makes it the BEST?
TURN INTO GOOGLE CLASSROOM
Contact Sheet
Edited Photo
Reflection
August 28
MANY OF YOU ARE MISSING YOUR SYLLABUS, PLEASE BRING IT TO ME BY FRIDAY!
MANY OF YOU ARE MISSING YOUR SYLLABUS, PLEASE BRING IT TO ME BY FRIDAY!
Goals for today:
- TURN INTO GOOGLE CLASSROOM
Contact Sheet
Edited Photo
Reflection - Ask for me to create a personal log in for you on your computer ( no more generic student log in! )
- If you are finished turning in your three assignments, review the history of photography video and answer the topic questions
|
August 29-30 - I will be coming around and assigning you a personal log in on your computer :-)
2. Watch the Ted Ed video on 'Illuminating Photography' (link on the right), and answer the seven multiple choice questions at the end of the video - YOU WILL NEED TO SUBSCRIBE TO ANSWER QUESTIONS: use your school email address. 3. Complete your reflection on google classroom and turn in! (IF you are done with ALL assignments and caught up with EVERYTHING on google classroom, you may start researching famous photographers. We will begin compiling some of our favorites on a google slide show. Review your favorite types of photography you submitted on your google slides as a starting point. Who are the photographers who shot these photographs? What makes their work interesting? Where did they receive their training/instruction? |


|
August 31 - IT'S FINALLY FRIDAY!!!
Goals for today:
- Watch the 'Illuminating Photography' video (if you haven't already) and answer multiple choice questions at the end (This does require you to subscribe to Ted Ed)
- Complete your reflection questions assignment from the video and turn in on google classroom
- Begin researching TWO photographers whose work you find interesting. You can review the slides you submitted to me last week as a starting point. You can also search Instagram, or these websites to get your started:
4. Create a google slideshow with four slides (TWO SLIDES FOR EACH ARTIST - TWO SLIDES FOR TWO ARTISTS = FOUR SLIDES)
- The first slide in your presentation should contain the photographer's name, and 4-5 examples of the photographer's work. The second slide should contain information about the photographer:
- Where can his/her work be seen?
- Where did the photographer receive his/her training? Where did they attend college, grad school, art school, etc?
- What kinds of themes/ideas/messages are included in the photographer's work and how is this perceived by viewers?
- Has the photographer received any awards, special recognitions, etc?
- Why do you personally like this photographer's work? Why is it interesting, inspiring, significant?
To make this visually appealing: pay attention to spatial qualities, such as layout, and organization of your images and information on your slides - The goal is to make people want to view your slideshow!
Week 3 : September 4-7
September 4
Goals for today:
September 4
Goals for today:
- Complete your four page slideshow on your chosen two photographers and turn in on google classroom
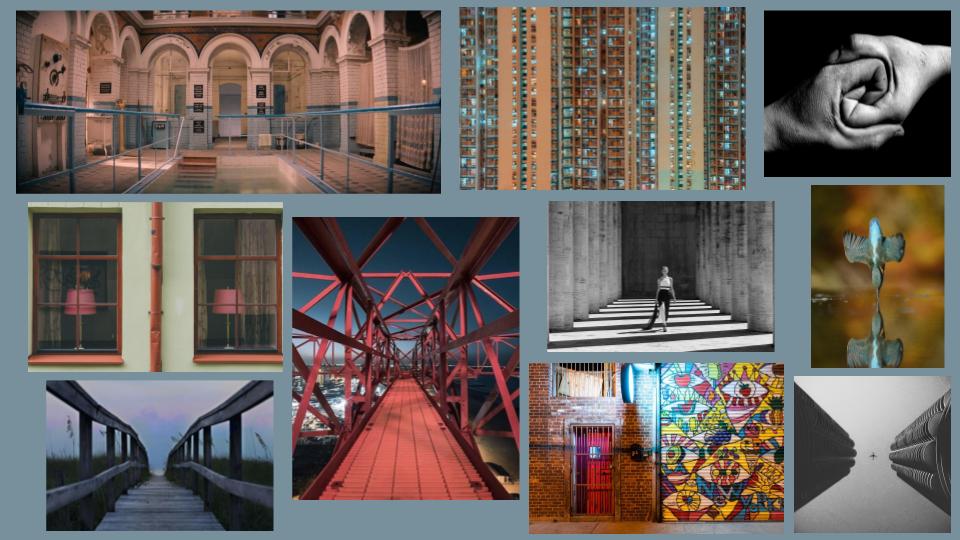
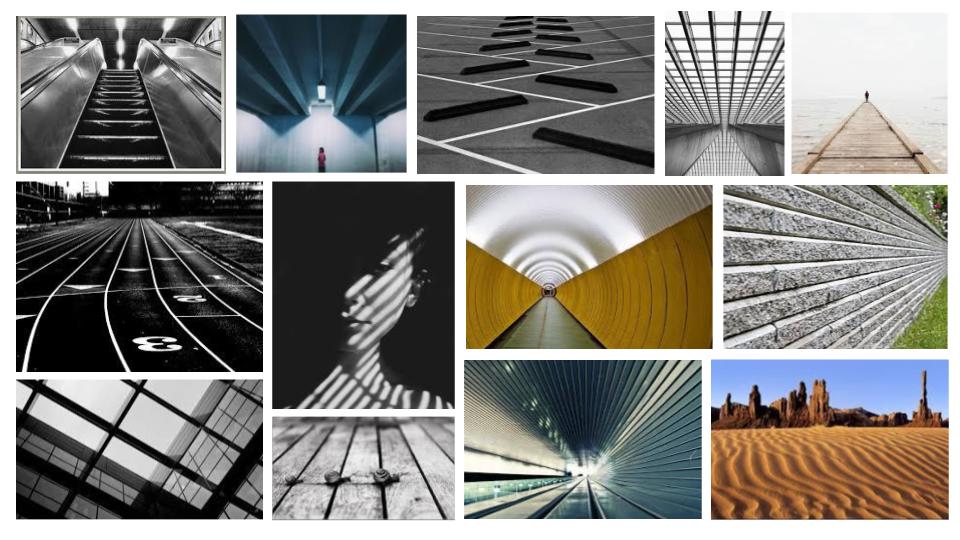
- Review the Point of View slideshow presentation and complete your mini research assignment - Find two examples for each point of view and create a google slideshow, using four slides total. Turn in on google classroom!


TOMORROW and THURSDAY - SHOOT AT CITY PARK
Please remember to bring your camera/cell phone!
Please remember to bring your camera/cell phone!
September 5th and 6th
GOAL: Students will review point of view examples, as they relate to photography and then apply the concept to their image making (Listening and speaking).
City Park Shoot
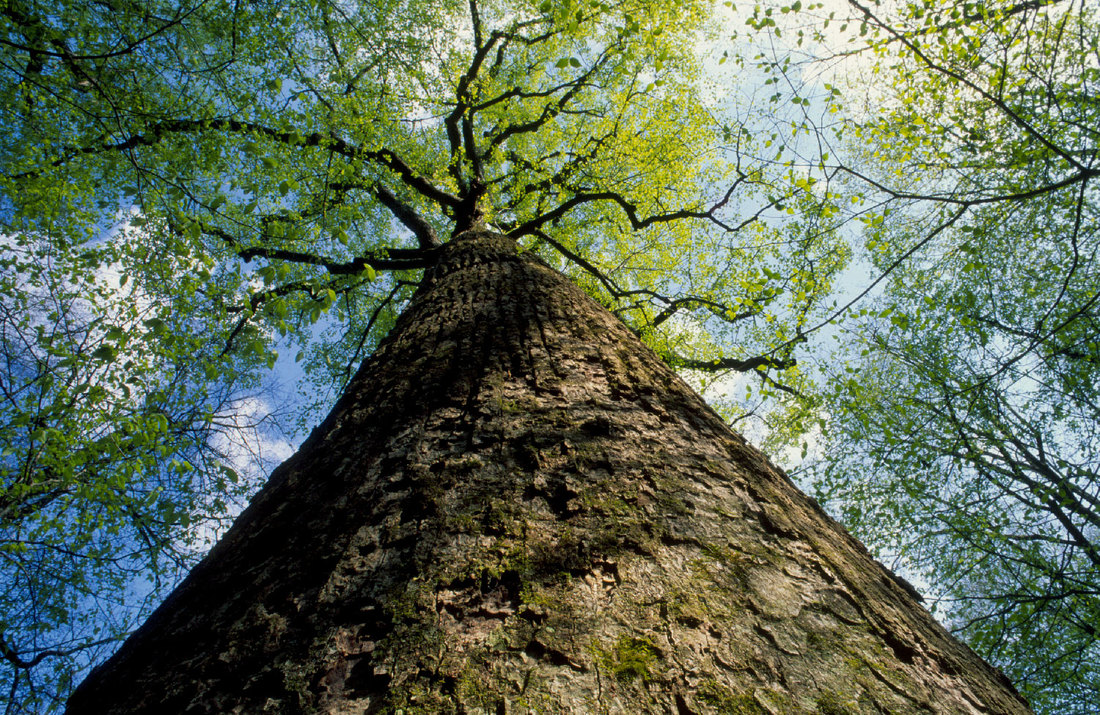
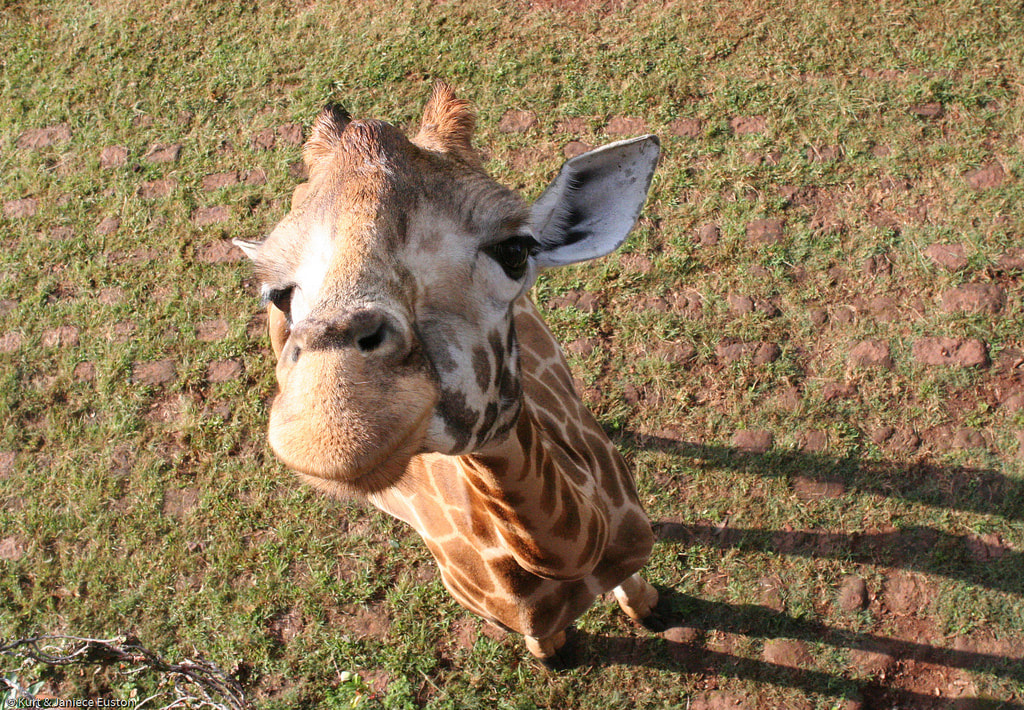
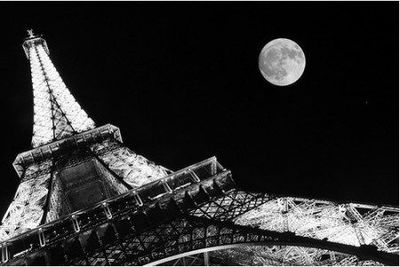
Shoot 6 images of each viewpoint - bird's eye, worm's eye, close up, and unusual perspective
Return to class and upload images - Upload images on your drive, then download them to a folder on your desktop
GOAL: Students will review point of view examples, as they relate to photography and then apply the concept to their image making (Listening and speaking).
- Review Point of View
- Pass & camera checkout
- We will all walk over together
- Stay in pairs, small groups
- Return to class at assigned time
City Park Shoot
Shoot 6 images of each viewpoint - bird's eye, worm's eye, close up, and unusual perspective
Return to class and upload images - Upload images on your drive, then download them to a folder on your desktop
September 7
Goal: Students will continue to familiarize themselves with the process of uploading/downloading, creating contact sheets, editing photos and turning in assignments.
- Make sure to complete your 'mini research' slideshow on Point of View. TURN IN on google classroom.
- Upload your twenty four images from the City Park shoot on your drive if you haven't done so yet.
- Download your images into a folder on your desktop labeled 'Point of View Photos'
- Create a contact sheet in Photoshop (Review instructions from the 30 in 30 assignment)
- Save to your drive - Make sure it is a .jpg file and it should be in 'low' quality.
- Choose your best examples for each Point of View: You should have one bird's eye, one worm's eye, one close-up, and one unusual perspective
- Using photoshop, edit your four photos - pay attention to highlights, saturation, resolution, etc. (Review instructions/tutorials on photo editing basics)
- NEXT WEEK: We will submit our contact sheet, our four edited photos, and have our first critique!
Week 4 : September 10-14
September 10
September 10
- Please make sure you have created your contact sheet with twenty four Point of View images and turn in on google classroom!
- Edit (using photoshop and paying attention to highlights, saturation, color/hue, etc.) your four photographs that you have chosen as your 'most successful examples' -
- One worm's eye
- One bird's eye
- One unusual perspective
- One close-up
- Save your four edited photos in a folder on your desktop (no need to turn in on google classroom this time). We will be participating in a group critique TOMORROW.
- When you are finished editing, please review the 'Composition in Photography' file below and begin searching for image examples
| composition_in_photography.pdf |
|
September 11
Goal: Students will demonstrate their understanding of point of view and support one another through giving verbal and written feedback on their images.
|
Point of View Reflection Questions
1. What was the purpose of this project? 2. Did you find yourself gravitating toward a particular point of view? Why do you think that? 3. Out of the four images you edited, which one is your strongest? Why? 4. What feedback did you get? How did you refine your images based off that feedback? 5. In what ways were you more successful on this assignment than the first assignment (30 in 30)? 
|
|
September 12 & 13 - PHOTO SHOOT
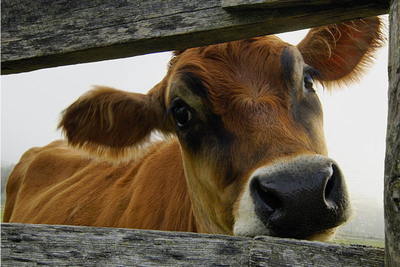
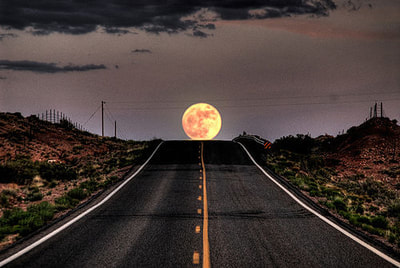
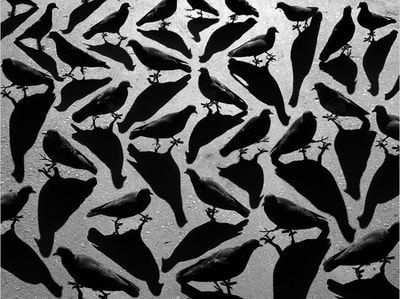
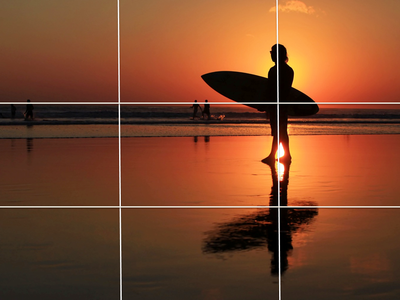
Goal: Students will shoot photographs to demonstrate understanding of compositional rules (speaking & listening). Shoot the following compositional guidelines: –Rule of Thirds –Asymmetrical Balance –Symmetrical Balance –Leading Lines –Pattern –Framing Try a variety of subjects around school to get the best (and most interesting) images. Stay on campus and be back ten minutes before end of class. Didn't finish? You'll have to shoot more this weekend! September 14 -Learning Objective: Students will continue to deepen their understanding of compositional guidelines by downloading their images from their photo shoot, editing, and turning in quality work.
Goals for today:
Upcoming Due Dates for Assignments and Projects on Google Classroom: Today:
September 18
|
Now that you have mastered the 'photo editing basics' - it's time to start learning how to use our tools in photoshop. Here are some to get you started:

Need More Help?
How to Straighten a Photo Week 5 : September 17-21 September 17 Written reflection for Composition Project 1. How does knowing about compositional guidelines help you become a stronger photographer? 2. Out of your shooting assignment, which image ended up being your favorite/best? Why? What compositional rule did you use? 3. Look at your contact sheet. Is there a compositional guideline that you tend to shoot a lot? Why do you think that guideline is easier for you to see? 4. Which guideline is the hardest for you to capture? Why do you think that? 5. Why is it important to continue taking photos outside of school and on your own time? |
|
At this point, you should be DONE with 'Point of View' assignments
Upcoming due dates/assignments/milestones for this week: Today:
Friday:
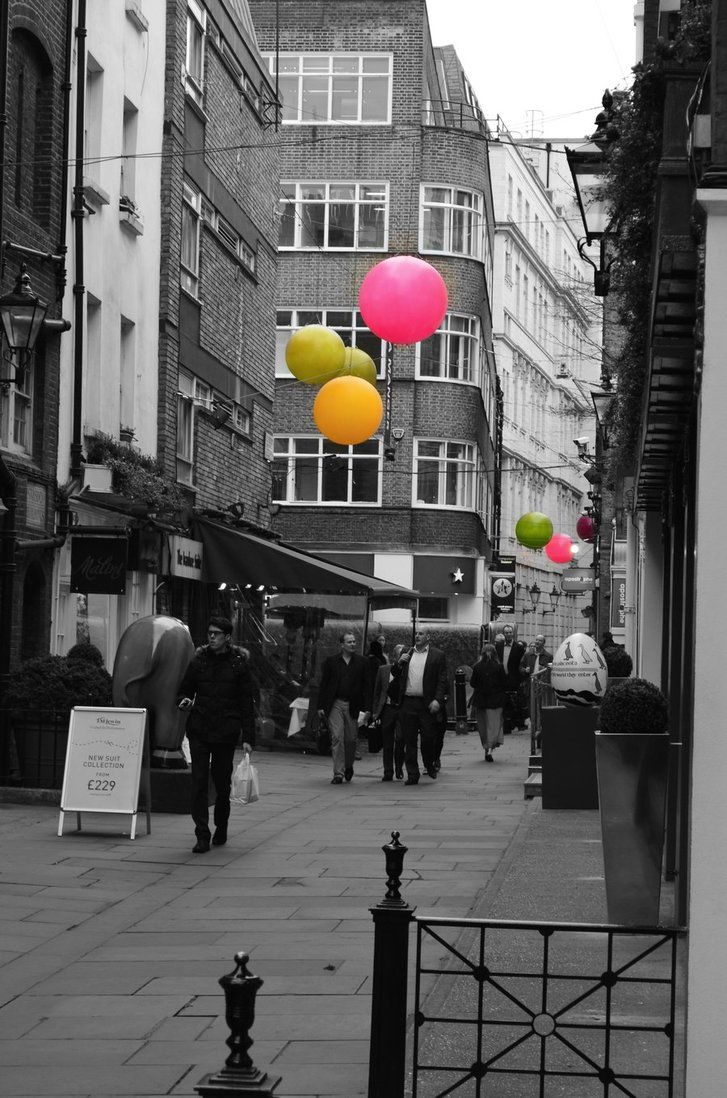
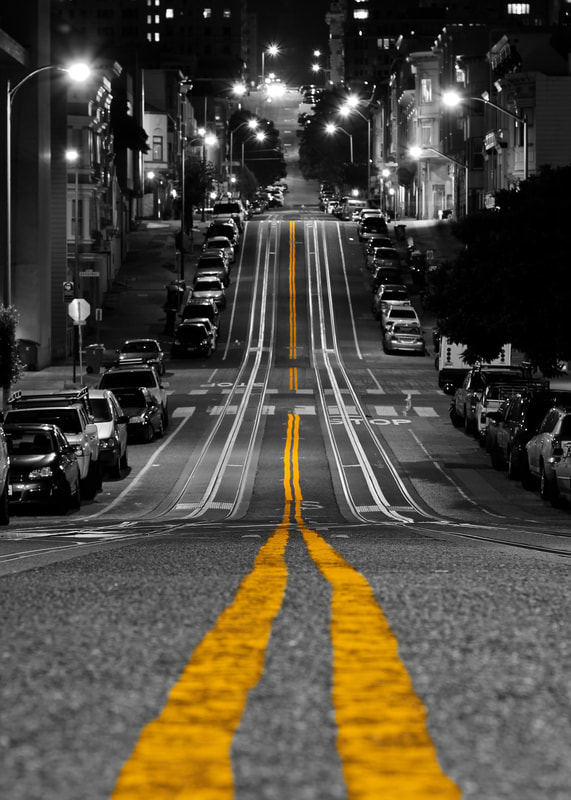
Some of you have been asking about how to colorize parts or sections of your photograph - here is a great tutorial to get your started!
|
In preparation for our photo shoot on Colfax, please watch the following videos in regards to 'photographic toning', 'color splash', and 'cropping photos into shapes'. PRACTICE with a photo of your choice!
|
|
September 19 & 20
Goal: Students will shoot images that can be used with the photo editing techniques they learned the day before (listening & speaking). Colfax Photo Shoot Using your knowledge of compositional guidelines and the photo editing techniques we learned yesterday, shoot at least 24+ images that capture the little details of our neighborhood. Make sure you sign out, including writing down your pass #. September 21
Goals: Students will review photo editing techniques (watching tutorials individually and as a class) in order to understand color, tone, black and white photography, etc. before editing photos from the previous photo shoot. Students will edit their 24+ images from the Colfax photo shoot, using ones that work most effectively with the photo editing techniques we learned this week. Don't forget to make basic editing adjustments (levels, sharpening, cropping, removing distractions) first BEFORE you add colorizing effects. You will be editing and turning in....
|
Reflection Questions from Colfax Photo Shoot
|


DUE TODAY:
- Your contact sheet containing all photos taken from the Colfax photo shoot - turn in on google classroom before you leave!
- Your Reflection Questions for the Colfax Photo Shoot - turn in on google classroom before you leave!
Week 6 - September 24-28
September 24
Goals:
Students will continue utilizing photo editing techniques (after watching tutorials individually and as a class) in order to understand color, tone, black and white photography, etc.
Students will edit their 24+ images from the Colfax photo shoot, using ones that work most effectively with the photo editing techniques we learned this week. Don't forget to make basic editing adjustments (levels, sharpening, cropping, removing distractions) first BEFORE you add colorizing effects.
You will be editing today and tomorrow, and turning in....
DUE TOMORROW (Tuesday):
September 24
Goals:
Students will continue utilizing photo editing techniques (after watching tutorials individually and as a class) in order to understand color, tone, black and white photography, etc.
Students will edit their 24+ images from the Colfax photo shoot, using ones that work most effectively with the photo editing techniques we learned this week. Don't forget to make basic editing adjustments (levels, sharpening, cropping, removing distractions) first BEFORE you add colorizing effects.
You will be editing today and tomorrow, and turning in....
- 1 black and white image
- 1 Color Splash image
- 1 color toned image
- 1 cropped into a shape
- Your Reflection Questions from the Colfax Photo Shoot - turn in on google classroom before you leave!
DUE TOMORROW (Tuesday):
- Your four edited photos - 1 black and white, 1 color splash, 1 color toned, and 1 cropped into a shape
September 25
Goals:
Students will edit their four photographs and turn in: 1 black and white, 1 color splash, 1 color toned, and 1 cropped into a shape - on google classroom at the end of class! (PLEASE remember to save each photograph as a .jpg file, and in 'high' quality).
Students will review the 'Colfax Photo Shoot Assignment' rubric and communicate (speaking and listening), before reflecting on their assignments (through writing), paying attention to successes/adjustments within the project.
For next class: Be prepared to check out a camera and learn about aperture and ISO settings!
Done Early? Review Aperture and ISO settings for our upcoming photo shoot.
|
September 26th and 27th - BLOCK DAYS
Goals: Students will apply their knowledge of aperture and ISO to create a clear progression in depths of field with a foreground, middle ground, and background in their images, after completing and submitting their four edited photos from the Colfax photo shoot and reviewing the 'Aperture and ISO settings' slides as a class.
f/5.6, f/8, f/11, f/16, f/22 (You will shoot 5 images total.) Photos must have a clear progression in focus and must be shot at the same angle. This is a non-negotiable and I will make you re-shoot until you get it right :) September 28th
Goals: Students will continue to apply their knowledge of aperture and ISO to create a clear progression in depth of field with a foreground, middle ground, and background in their images. PLEASE REVIEW THE APERTURE STUDIES FROM LAST CLASS:
October 2nd
Due Today: Aperture Study Project Goal: Students will complete their aperture study project and submit on google classroom, and begin designing their digital portfolio and upload their beginning assignments that demonstrate their learning so far in the course. (speaking & listening).
Done? Start adding examples of professional work to your Inspiration Page - what kind of photography is interesting to you? |

Week 7: October 1st - October 5th
October 1st Goals: Students will review their understanding and knowledge of aperture and ISO settings by uploading and submitting their BEST photos from last week Students will compare photographs which contain a clear progression in aperture settings and label each on in photoshop, then submit through google classroom. PLEASE REVIEW BOTH SETS OF APERTURE PHOTOS FROM LAST WEEK
October 3rd
Goal: Students will continue to explore the concept of depth of field by exploring the 'iris blur' in photoshop, as well as making sure personal websites contain photo projects created since the beginning of the year. 1. Watch this video (use headphones or earbuds). Apply the Iris Blur to one of your photos (save as irisblur_name.jpg). Turn in your original photo and your blurred photo to Google Classroom. 2. Double check your website and the required pages / projects you need to have featured. If you have extra time - can you add some photography to your inspiration page? |
October 4th and 5th
Goal: Students will continue to explore the concept of depth of field by practicing using the 'tilt shift filter' in photoshop, as well as making sure personal websites contain photo projects created since the beginning of the year.
Goal: Students will continue to explore the concept of depth of field by practicing using the 'tilt shift filter' in photoshop, as well as making sure personal websites contain photo projects created since the beginning of the year.
- Double check to make sure you submitted your two photos (before and after) using the 'Iris Blur' filter from yesterday. Review the 'Tilt Shift Filter' reading and practice using this on a photo of your choice from this semester. Submit both the before and after photo on google classroom.
- Continue working on personal websites, making sure all pages are present, and you have begun uploading projects to your 'projects' page.
- Things to consider: Your website 'theme', your inspiration page containing photography you are interested in, your home page- what personal information would you like to include?
|
October 8th-9th
Goal: Students will continue to explore depth of field (DOF) by completing assignments, turning them in on google classroom, and reviewing expectations involving aperture for our upcoming photo shoot at the Botanic Gardens. Students will also finalize websites and complete reflections. REVIEW: SHALLOW DEPTH OF FIELD and LONG DEPTH OF FIELD *WE WILL BE SHOOTING EXAMPLES AT THE GARDENS THIS WEEK
|
WEBSITE CHECK
Home Page
|


|
Double check to make sure you have turned in the following assignments:
|
FIELD TRIP DAYS:
7th Hour: THURSDAY - Meet in Room 126 at 11:15 to check out cameras - DON'T BE LATE 8th hour: WEDNESDAY - Meet in Room 126 at 1:00 to check out cameras - DON'T BE LATE |
|
October 10th and 11th - Field Trip to Botanic Gardens
You should be shooting images of
For those of you who were NOT on the field trip and/or did NOT take photos of 'long depth' and 'shallow depth':
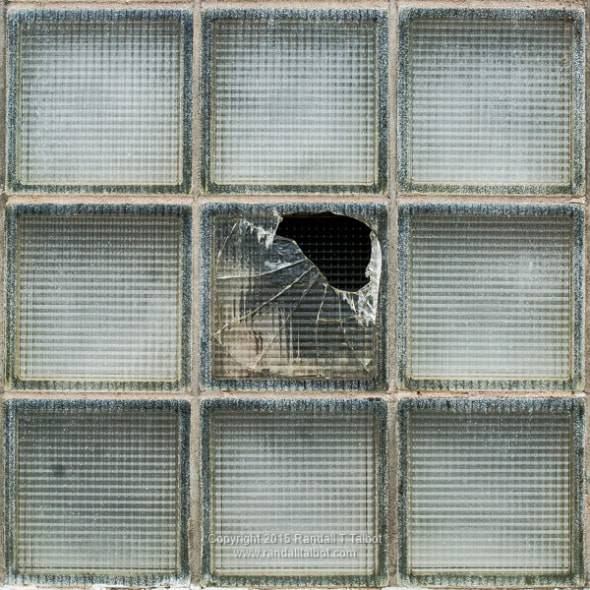
Below are images that are direct representations of halloween. There's not much room for the imagination, what you see is what you get. Just because something is gross and bloody, does not mean that it's spooky. After you move past the blood and gore, there is no more room for the imagination.
These are examples of WHAT NOT TO DO! |
October 12th
Goals: Students will create assignments and reflect (written) on their photo shoot from the Botanic Gardens, in order to better understand aperture and depth of field. For Today:
October 15th
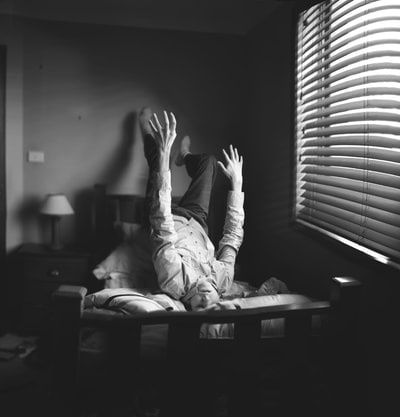
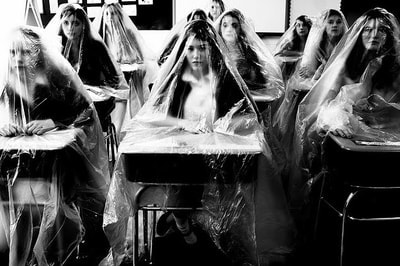
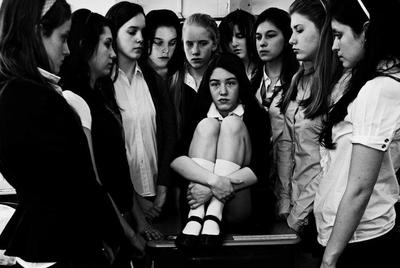
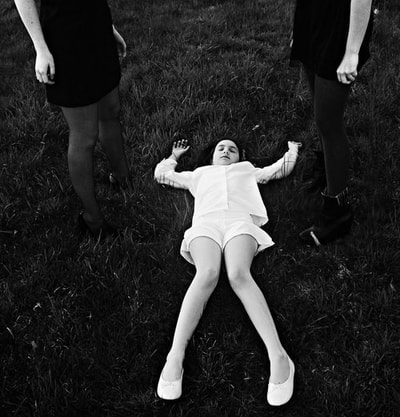
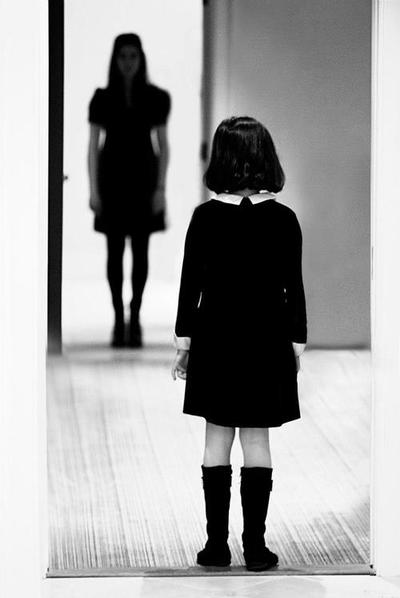
Students will be introduced to the 'creepy photo' assignment, after discussing as a class and in small groups specific photographs and the effect they have on our nerves and their 'unsettling' nature. For today:
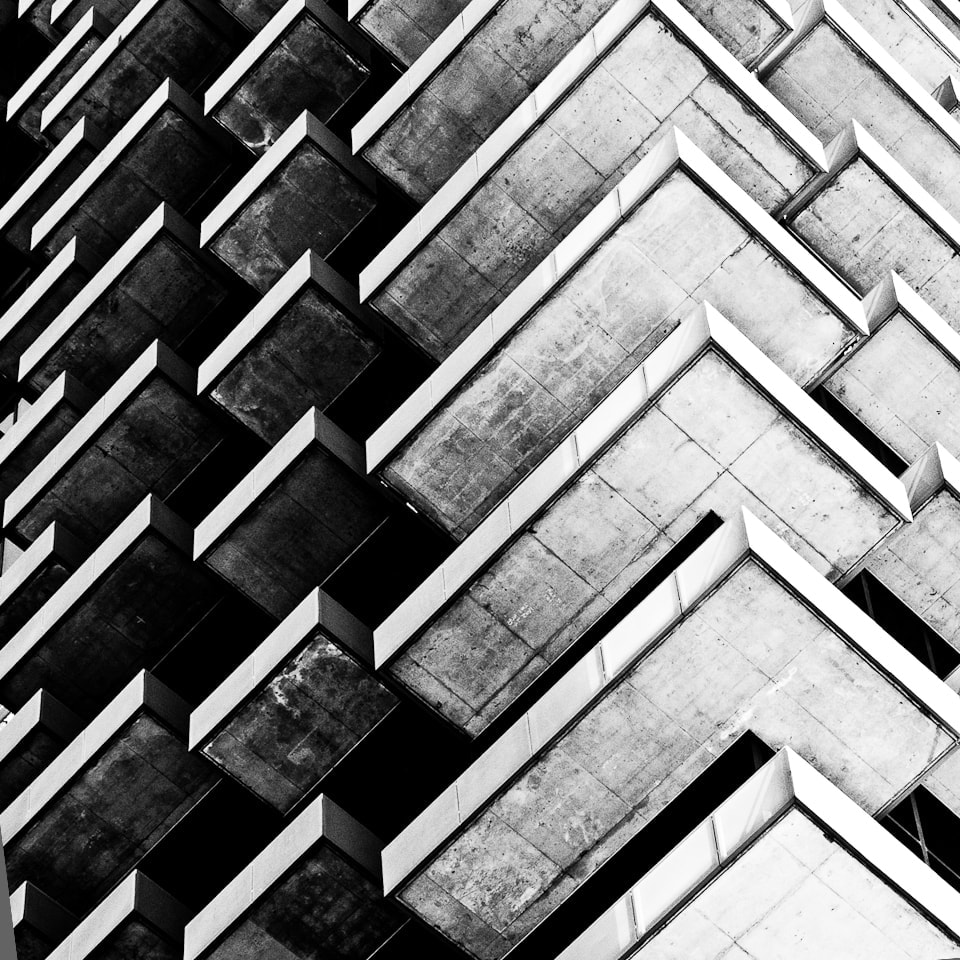
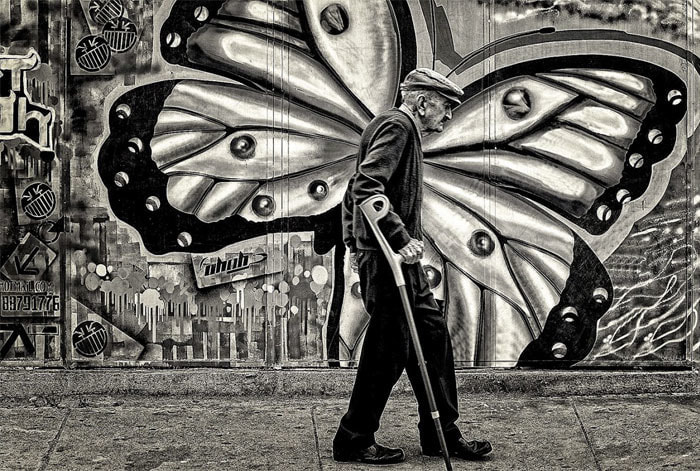
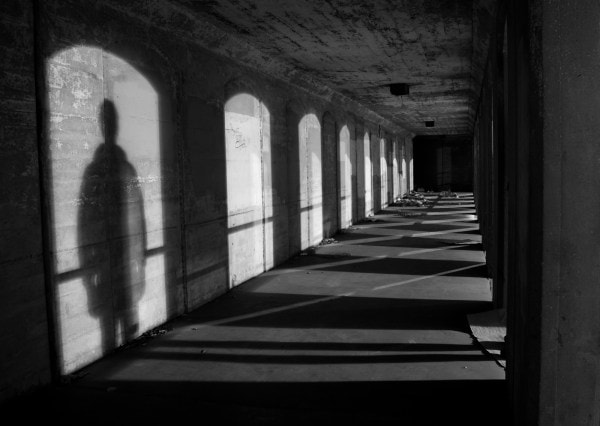
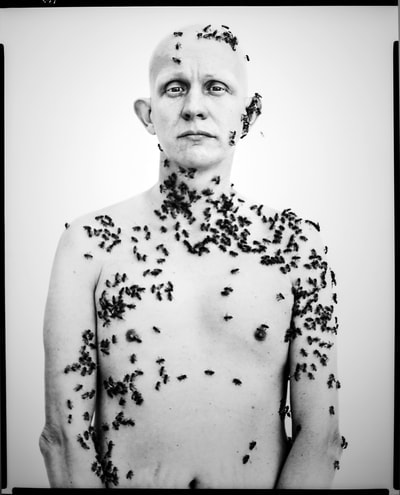
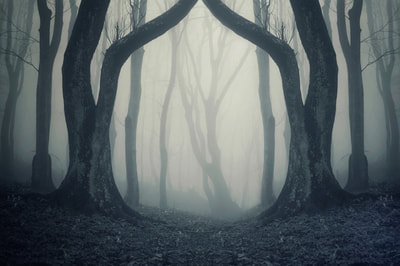
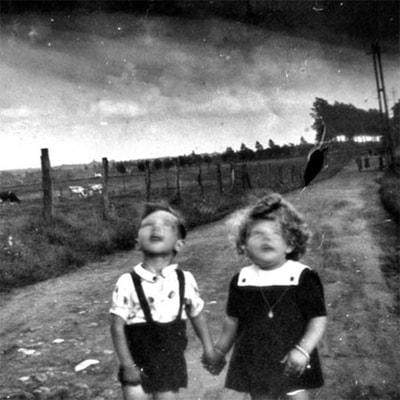
Examples of Creepy, Disturbing, and Unsettling Photography
|
|
|
|


|
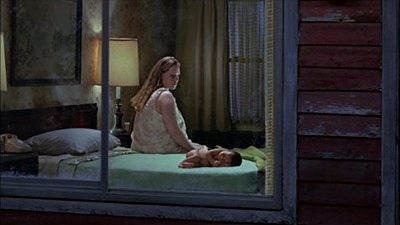
Photographer Below: Gregory Crewsdon
Crewdson's photographs usually take place in small-town America, but are dramatic and cinematic. They feature often disturbing, surreal events. His photographs are elaborately staged and lit using crews familiar with motion picture production and lighting large scenes using motion picture film equipment and techniques |
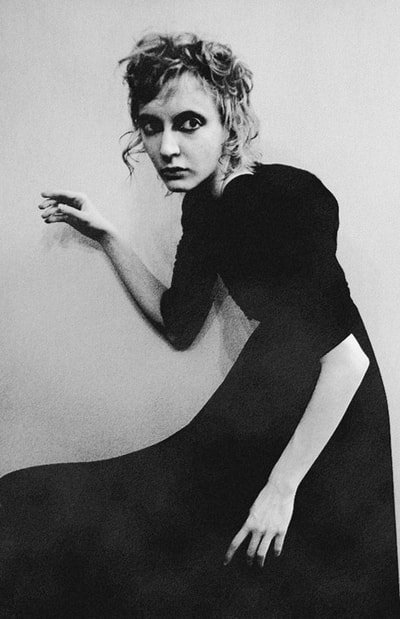
Photographer below: Diane Arbus
Diane Arbus was an American photographer noted for photographs of marginalized people—dwarfs, giants, transgender people, nudists, circus performers—and others whose normality was perceived by the general populace as ugly or surreal. |


|
Click the link to the right: The unsettling Art of 'Death Photography'
|
Homework: Either take advantage of the full fall color here in Denver or start shooting your Spooky/Creepy project.
|
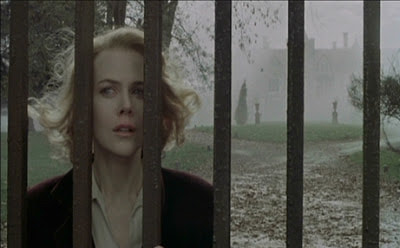
Scene from 'The Others', 2001
October 17th and 18th
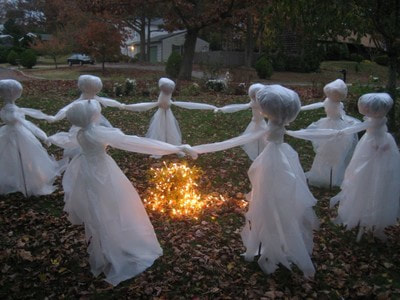
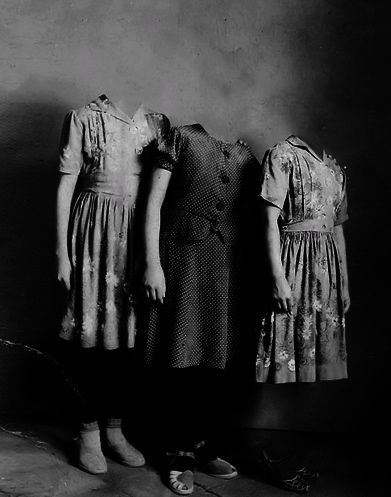
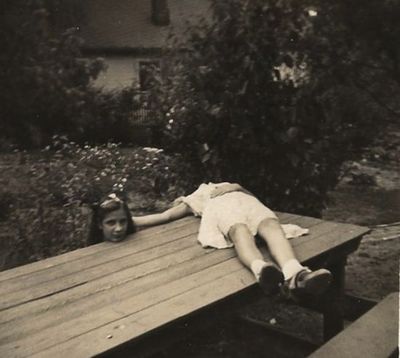
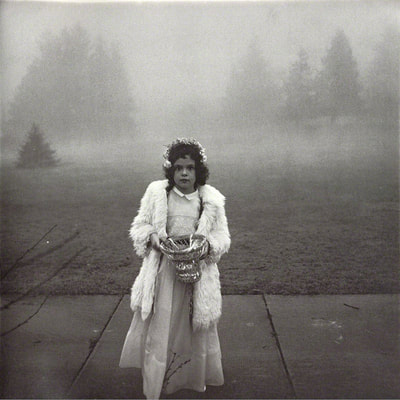
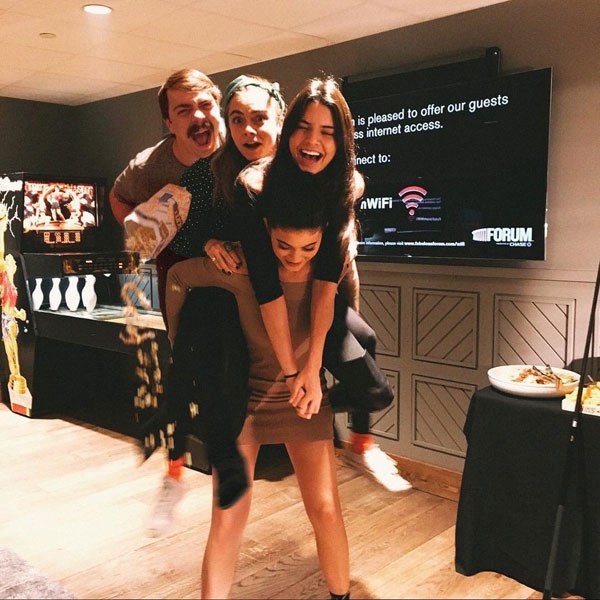
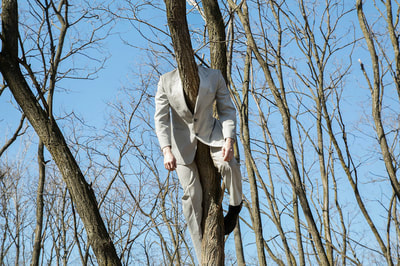
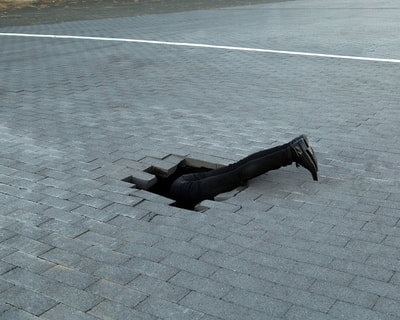
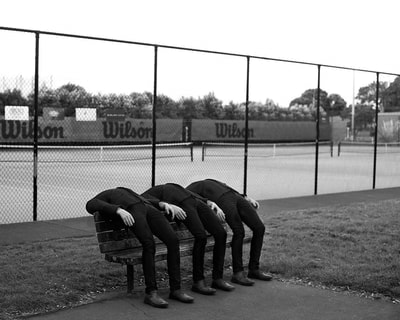
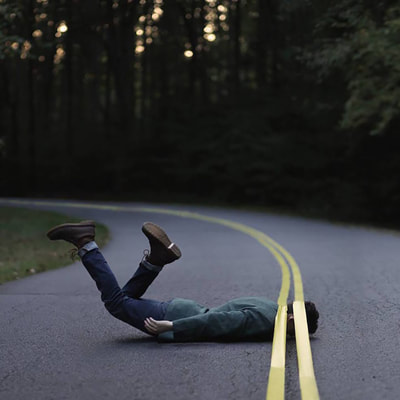
Students will continue working towards learning about and researching for their spooky photo assignment by watching tutorials and practicing creating eerie effects through photoshop editing techniques. Possible Challenge/Stretch Goal: Consider 'telling a story' through your Creepy Photo Assignment. Look at the progression of photos below for an example. How do these relate to one another/play into one thematic series of events?
This series of school girls photos creates a story for the viewer. It's not clear what's exactly about, but it allows the view to use their imagination and connect the dots to create a story.
Warm Up/Class Activity:
Check out this image I captured over the weekend in Iowa! What photo editing techniques should I use? 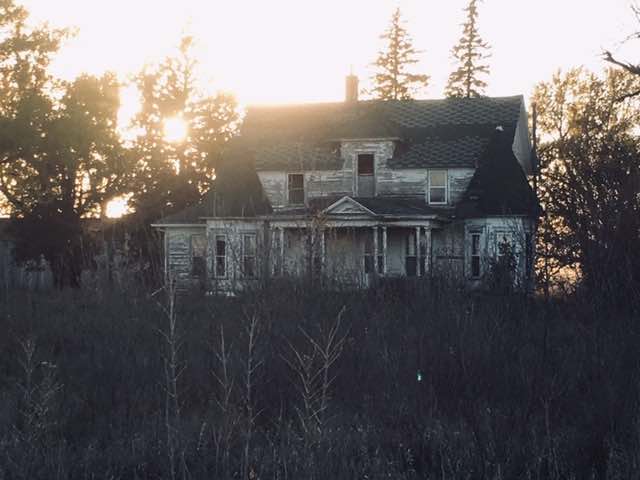
October 26th
GOAL: Students will continue creating their 'Spooky Photo Project', using editing techniques and photoshop tools on 3-5 photos in order to understand how photography can create unsettling, disturbing imagery. Challenge: create a photo series which tells a story, includes a 'progression' of scenes/imagery. October 29th
GOAL: Students will work towards creating a finished and final 'Spooky Photo Project', using editing techniques and photoshop tools on 3-5 photos in order to understand how photography can create unsettling, disturbing imagery. Challenge: create a photo series which tell a story, and includes a 'progression' of scenes/imagery. October 30th
Today is the LAST DAY to finish your spooky photo project. You will need:
October 31st & November 1st
GOAL: Students will complete a written reflection of their work before participating in a critique of others' work through writing and discussion. 1. Complete your written reflection, making sure to answer all questions completely. 2. Put all 3-5 images up on your screen as well as your name 3. Group critique: find a partner and choose TWO other students' projects to critique. Make sure you fill out the worksheet as completely as possible - it is worth points AND you will be supporting one another in our learning process. GIVE THE FORM TO ME AND I WILL HAND THEM BACK TO ALL OF YOU 4. Read your feedback and act upon it (I will give you time to adjust your images if you need to, before submitting them). 5. Write out your reflection and post everything to your website (images, contact sheet, reflection) 6. Complete the questionnaire on google classroom. November 2nd
GOAL: Students will work towards creating a 'Pop Art Selfie', utilizing specific photoshop filters and shortcuts after reviewing individually, and as a class a shared tutorial to assist them.

My 'Pop Art Selfie'
November 6th
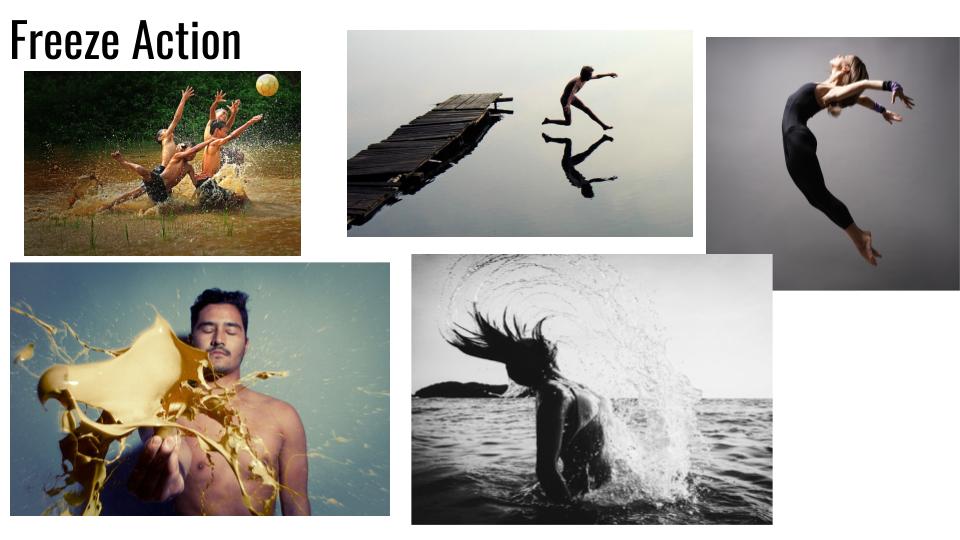
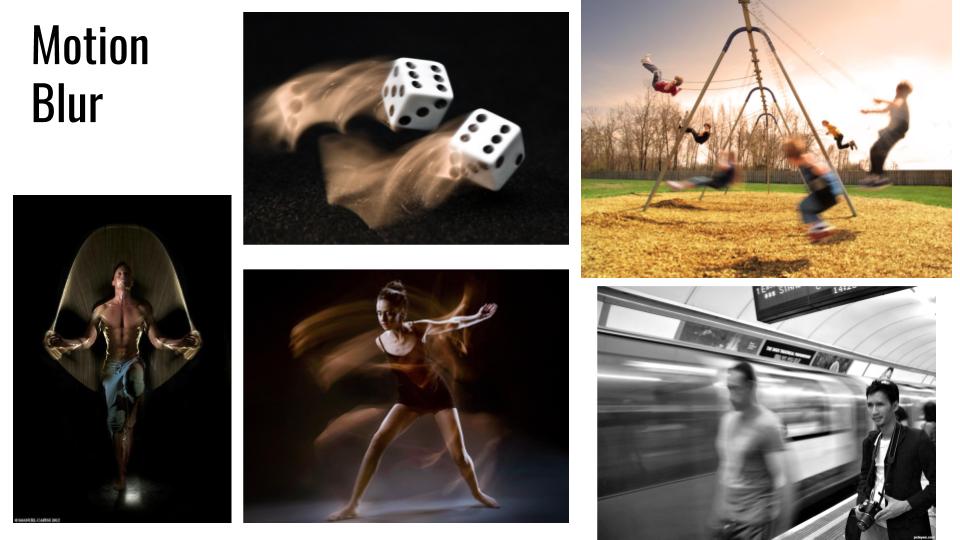
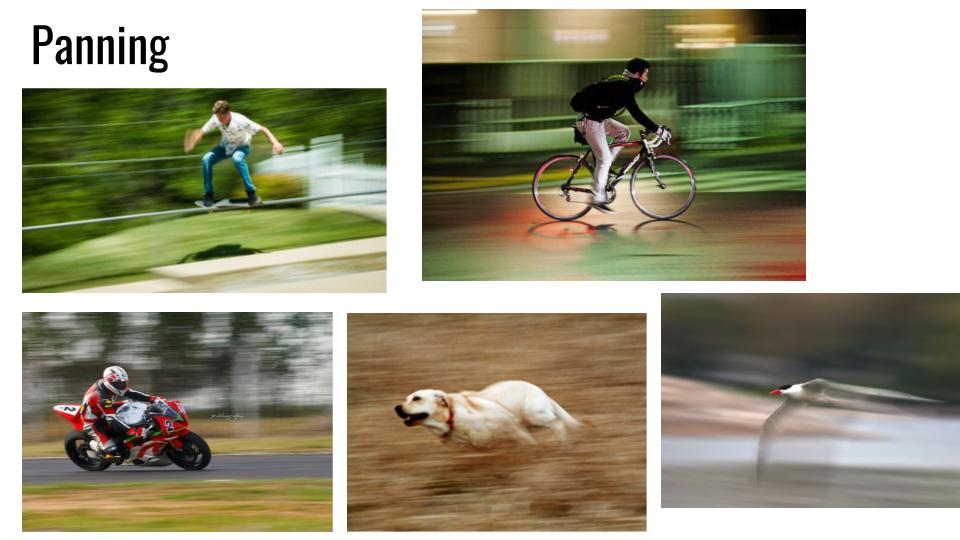
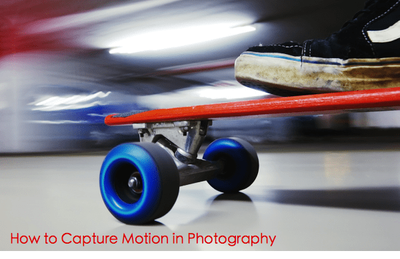
GOAL: Students will create their three slides (using google slides), showcasing their understanding of motion blur, freeze action, and panning, after researching for examples online and discussing as a class the importance of shutter speed and settings on their cameras in preparation for our upcoming photo shoot.
November 12th
Today you will be learning how to "fake" the appearance of motion TWO WAYS - motion blur and radial blur.
Choose ONE out of the THREE tutorials on motion blur. You can use a photo off the Internet to do the tutorials. Speeding Car Effect (video and text) - Advanced How to Create Motion Blur (text) - beginner How to Add Motion Blur to Background - intermediate THEN, you will try out the idea of radial blur with the following tutorial: How to Create Radial Blur Turn BOTH finished tutorial images into Google Classroom.
November 13th
GOAL: Students will continue to explore motion photography, in order to understand the effects on photography, through the practice of editing photos using shared tutorials on photoshop. DUE AT THE END OF CLASS:
November 14th and 15th
Objective/Goal: Students will work towards completing their individual motion photography project, focusing on editing techniques and processes, in order to better understand shutter and the effect that motion has in their work before reflecting on their projects using a teacher-provided written form on google classroom. AGENDA:

November 26th
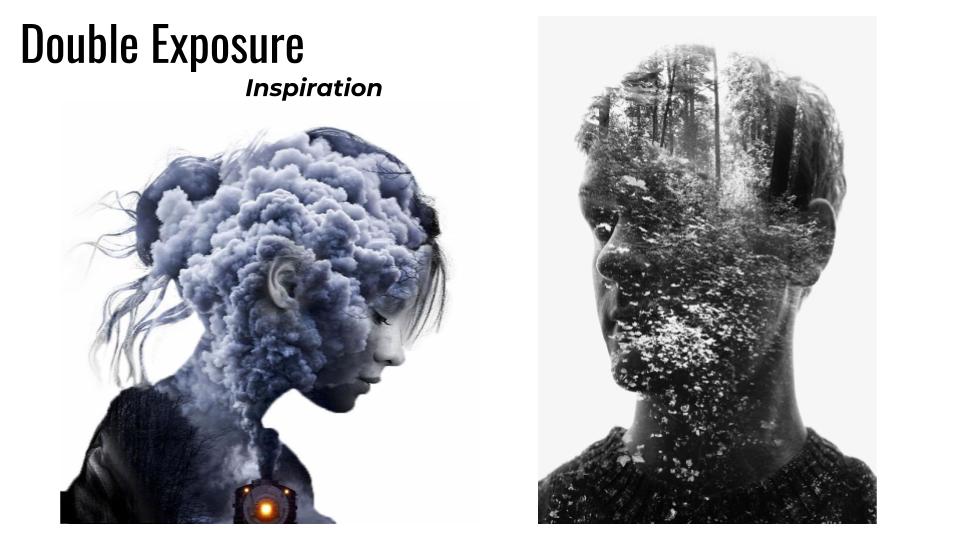
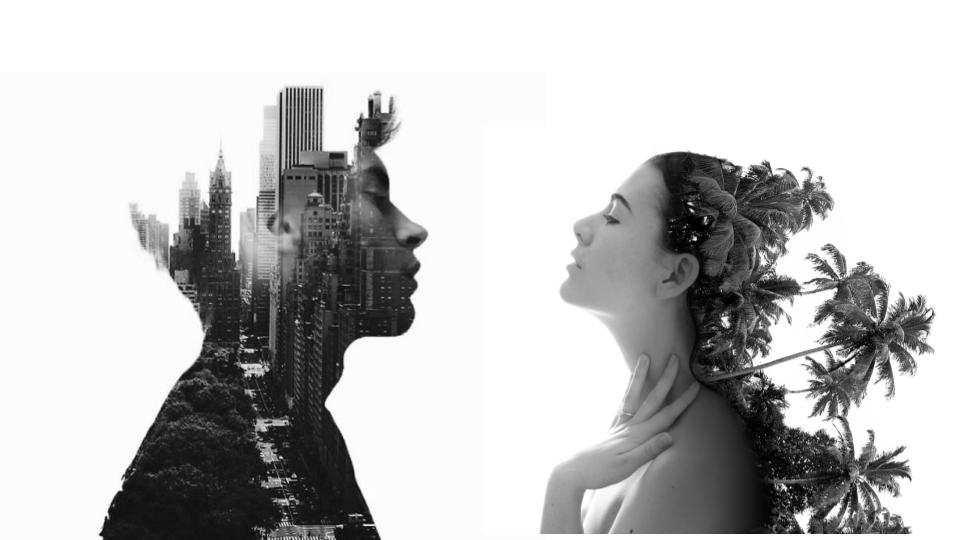
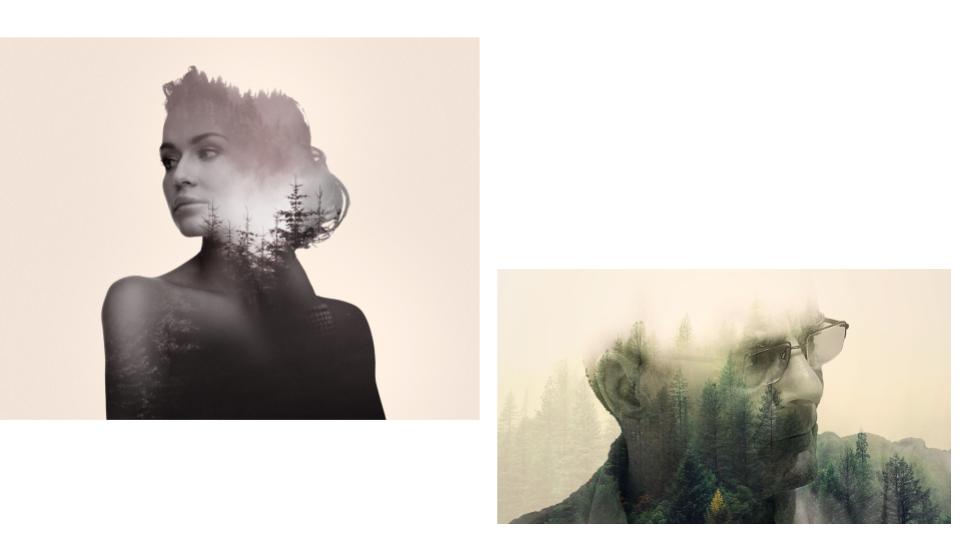
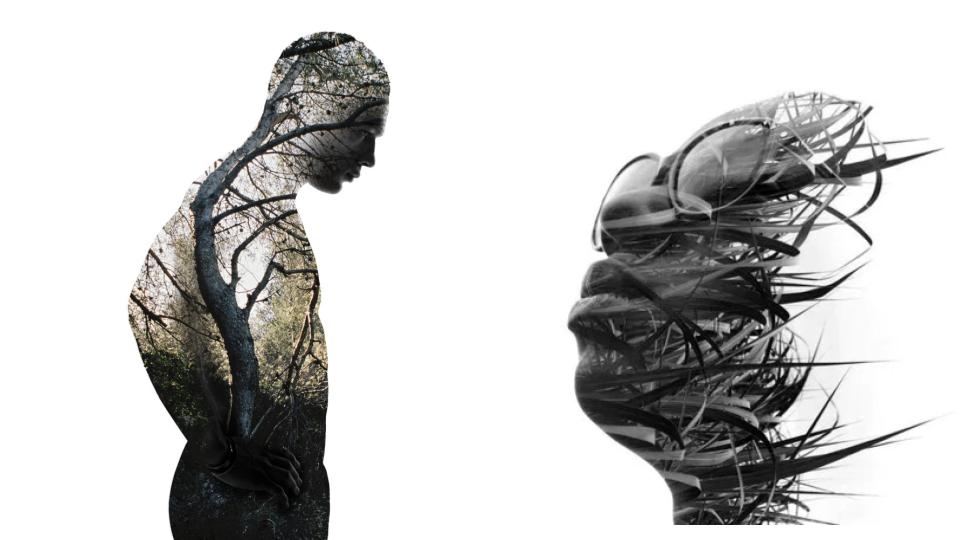
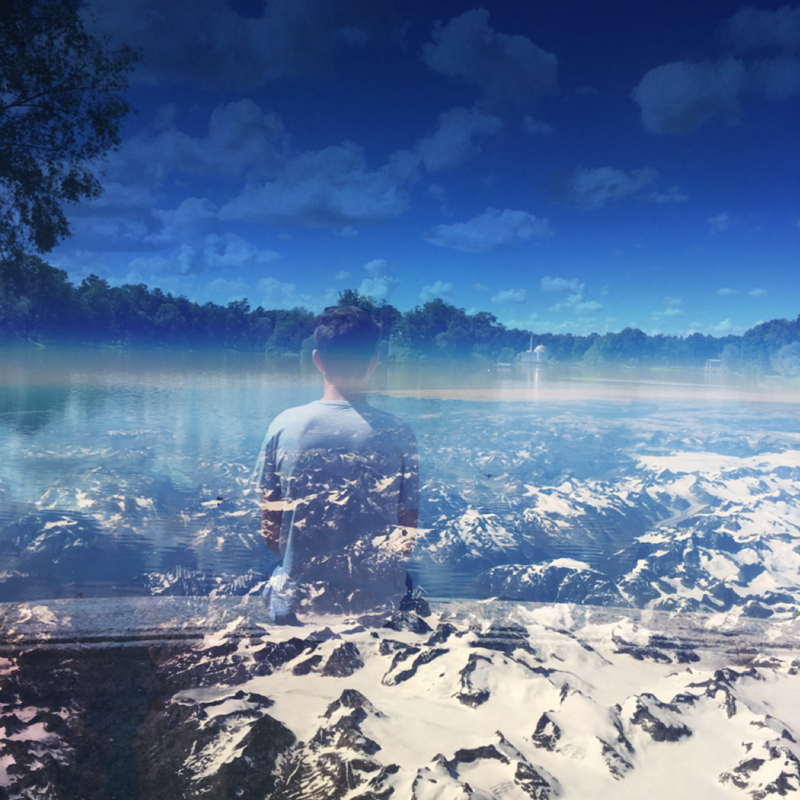
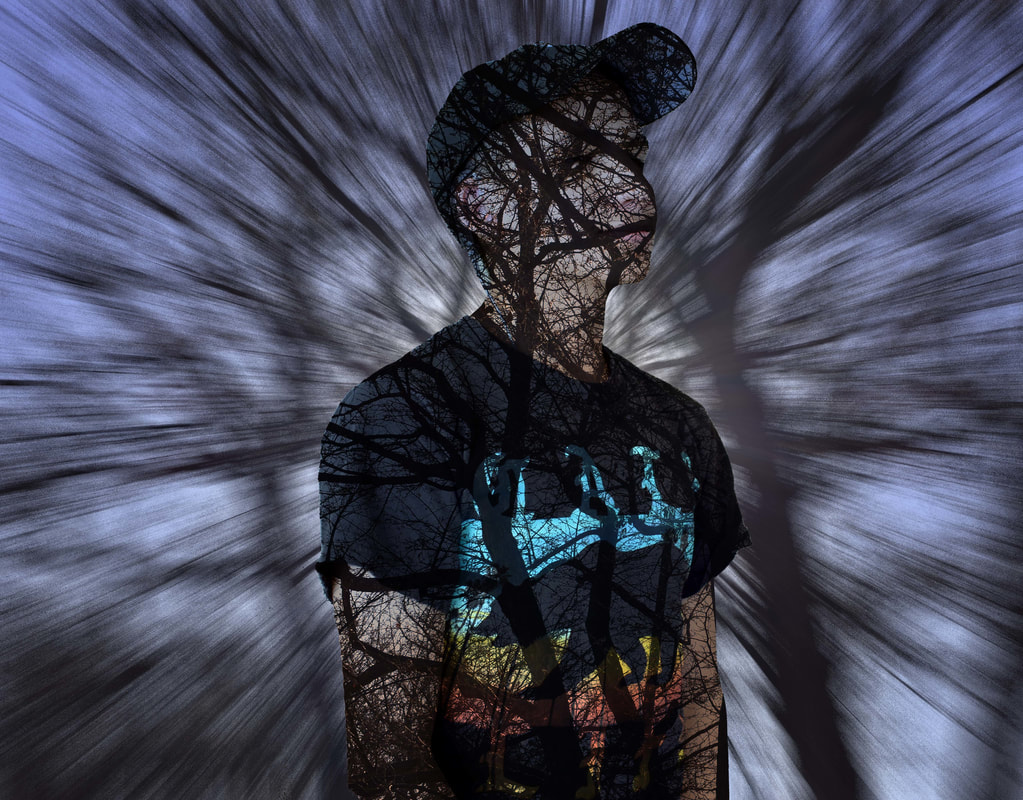
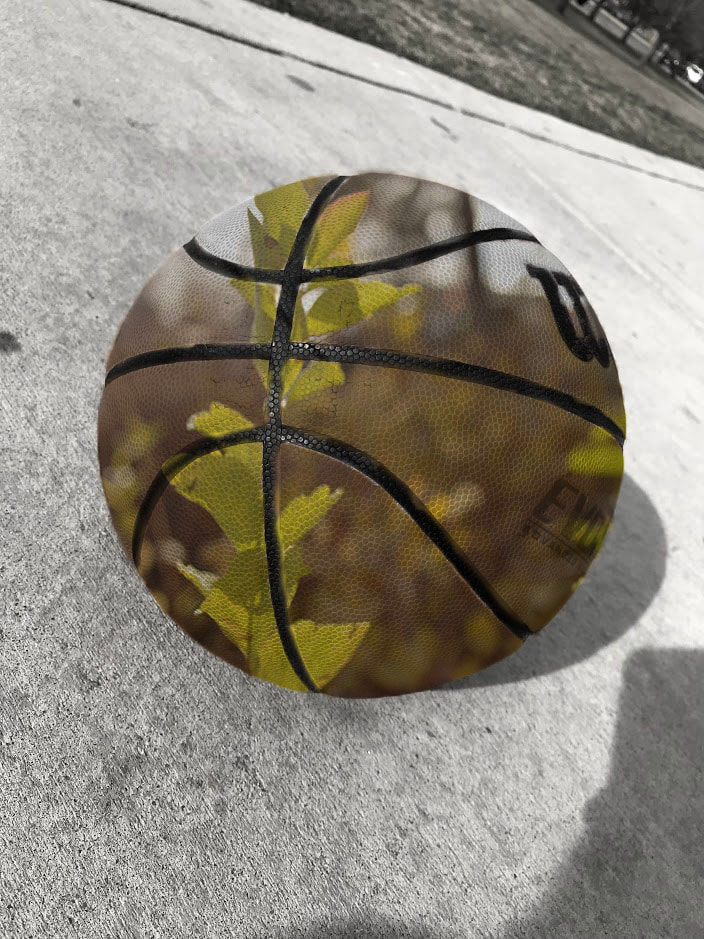
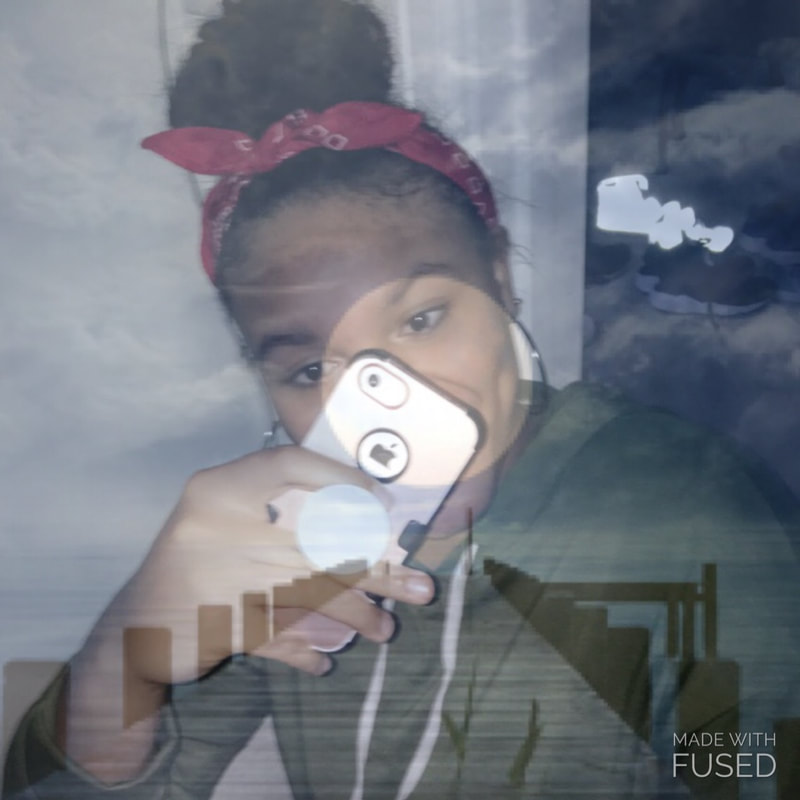
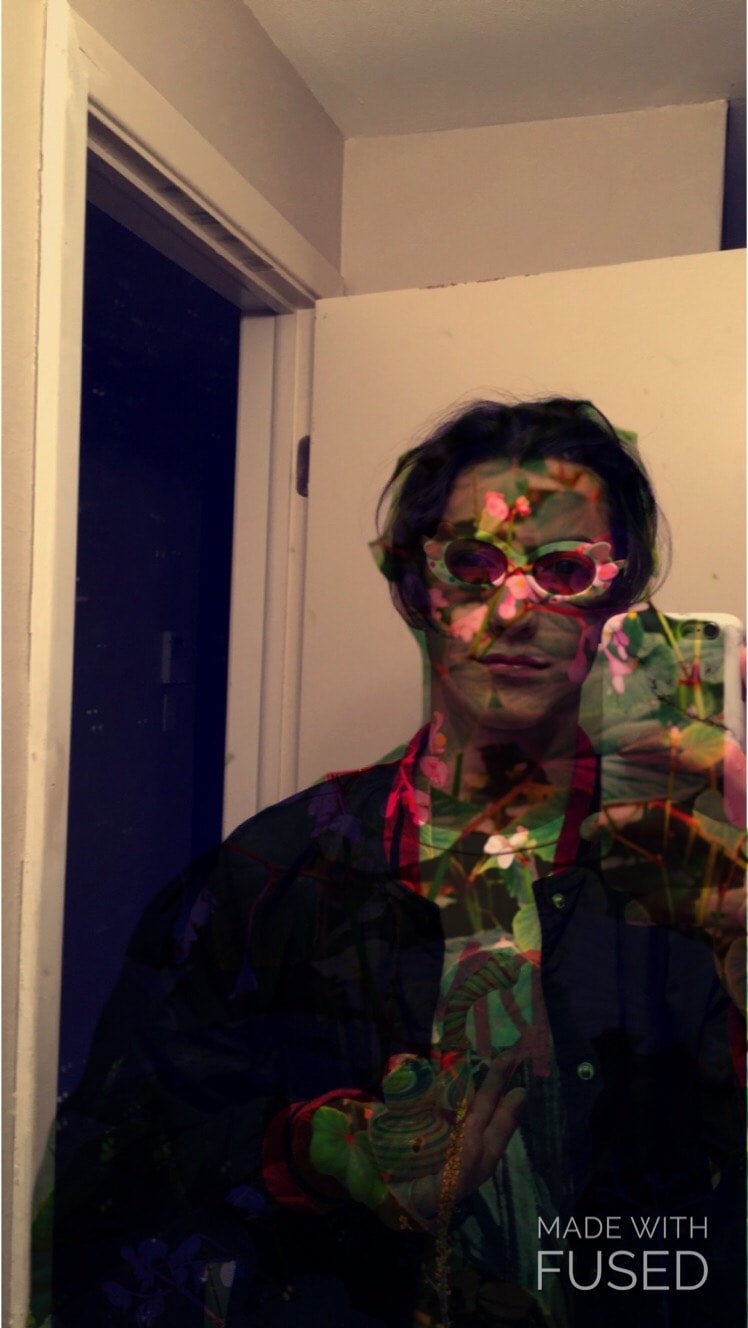
Welcome Back! I hope you are well-rested! Objective/Goal: Students will begin researching/collecting images to create a 'mood board', focusing on inspirational photography that features 'double exposure images', in order to prepare for the Double Exposure Project. Create a mood board using Google Slides of 8+ images that demonstrate the concept of double exposure.
November 27th Objective/Goal: Students will work towards creating an initial 'double exposure project', utilizing stock photos from online and referring to the tutorials for step-by-step instructions in order to understand how double exposure can be created/portray meaning and/or make a statement. Examples of Double Exposure Project
What you will turn in:
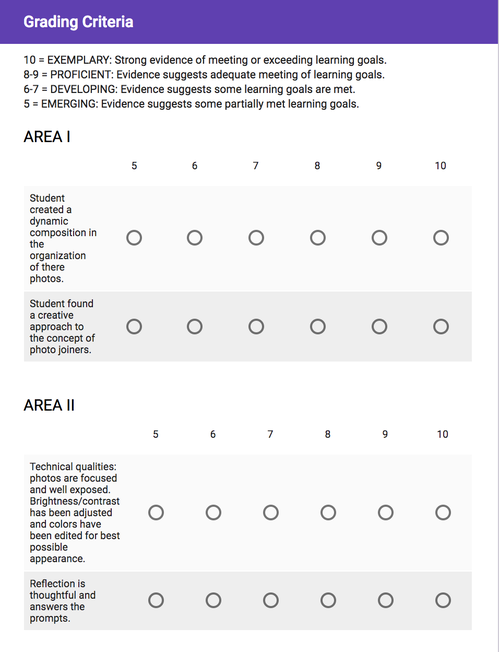
Rubric Guidelines: What you'll be graded on:
December 3rd
Objective/Goal: Students will continue working towards creating a 'double exposure project' through capturing photos and editing (using photoshop techniques), after planning and generating ideas surrounding story-telling/ using symbolism/metaphor for a specific message. AGENDA FOR TODAY:
December 4th
GOAL: Students will work towards creating their double exposure project, utilizing different editing techniques in photoshop, after participating in a group critique of others' work through writing and discussion. Warm Up: Answer Survey Question on google classroom 1. Pull up your project images and make adjustments to prepare for feedback. 2. Display your image(s) on your screen: make sure your name is viewable. 3. Group critique: find a partner and choose TWO other students' projects to critique. Make sure you fill out the worksheet as completely as possible - it is worth points AND you will be supporting one another in our learning process. GIVE THE FORM TO ME AND I WILL HAND THEM BACK TO ALL OF YOU 4. Read your feedback and act upon it. What do you need to do to make your project more successful before it is due at the end of the block period? December 7th
GOAL: Students will create a finished and finalized double exposure project, utilizing different editing techniques in photoshop, in order to communicate a message/theme/concept, etc., before reflecting on their work using a teacher-provided written form. DOUBLE EXPOSURE REFLECTION
1. Which process did you like the best (using cell phones, a particular photoshop technique)? Why? 2. What kind of feedback did you get during the critique? What feedback did you use to make your images better? 3. What are you proud of in this assignment? Explain. 4. What would you do differently to make this project more successful? Explain. 5. What message/theme/statement were you making in this project? How does your viewer get a strong sense of this? 6. What grade do you think you deserve and why? (an "A" would require you to have ALL components of the assignment). December 10th - Sorry, I lost my voice over the weekend - please be patient :-(
GOAL/OBJECTIVE: Students will work towards creating the 'Pop Art Selfie' project, reviewing the tutorial on filters and color effects in photoshop, before checking individual websites and publishing in preparation for our final exam next week. WEBSITE CHECK THIS WEEK - more to come on that...
Please Review the Rubric (below) on what you will be graded on for the website check on Block Day! When finished with the pop art selfie project, work on updating your website to meet the requirements for your grade. Don't worry about the Portfolio Page yet, we will complete this during our final next week.
December 11th
GOAL/OBJECTIVE: Students will work towards completing the 'Pop Art Selfie' project (due at the end of block day this week), reviewing the tutorial on filters and color effects in photoshop, before checking individual websites and publishing in preparation for our final exam next week. AGENDA:
Student website example: This student would receive full points for their completed website: tatianastephenson.weebly.com/projects.html
|
October 16th
Students will continue working towards learning about/researching for their spooky photo assignment by creating a 'mood board' and watching tutorials/practicing creating effects through photoshop editing techniques In preparation for our 'Creepy Photo' Assignment, these tutorials are extremely helpful. You do not need to use ALL of them, however if there is an effect you are looking for which I have not provided you, you can always do a search online/ask for assistance.
Considerations and Personal Checks:
October 24th and 25th - Welcome back! I hope you are rested.
GOAL: Students will upload and edit their images from the break to fit the assigned prompt - Spooky Photo Assignment.
DEADLINES:
Some of you have been wondering how to transfer an image into another image on Photoshop. Here's a great tutorial to get you started - it's easy to follow and the version Mike uses is the same we use in class!


Time permitting: Choose a selfie (or two) and upload your favorite(s) to your desktop: we will be playing with photoshop filters for our next project!
November 5th
GOAL: Students will utilize the shared tutorial and reference previous instruction in creating a 'Pop Art Selfie' project, focusing on using filters and mac shortcuts in becoming more proficient in mac interface tools.
November 7th and 8th: Block Days/Photo Shoot!
GOAL: Students will capture photos, individually and with partners, using cameras, equipment (tripods) and props, showcasing their understanding of motion blur, freeze action, and panning, in order to understand the importance of shutter speed and settings which capture movement.
HOW TO CONTROL SHUTTER •FREEZE ACTION: Fast/Stopped Action – 1/250 or higher •MOTION BLUR: Slow/Blurred Action – 1/30 or slower (with tripod) •PANNING – Set shutter to 1/60 November 9th
GOAL: Students will continue to explore motion photography, in order to understand shutter speed and settings through capturing photos, using props and objects, in preparation for editing and submitting assignments next week.
Good Examples of Motion Photography
Not-so-great Examples of Motion Photography
November 16th
Objective/Goal: Students will complete and submit their individual motion photography project(s), focusing on editing techniques and processes, in order to better understand shutter and the effect that motion has in their work before reflecting on their projects using teacher-provided written questions on google classroom. AGENDA:
Part 1: Practice tutorial using online images
Directions:
November 28th and 29th
Objective/Goal: Students will work towards creating a 'double exposure project' through capturing photos and planning, after completing the practice assignment and answering a warm-up question (written) in regards to what makes a successful project. WARM UP: ANSWER ON GOOGLE CLASSROOM
AGENDA FOR TODAY:
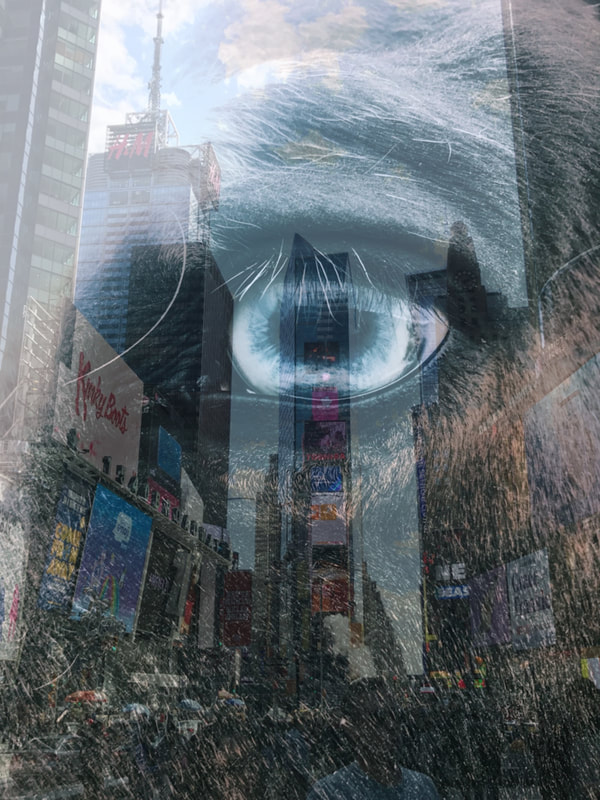
Successful student project examples
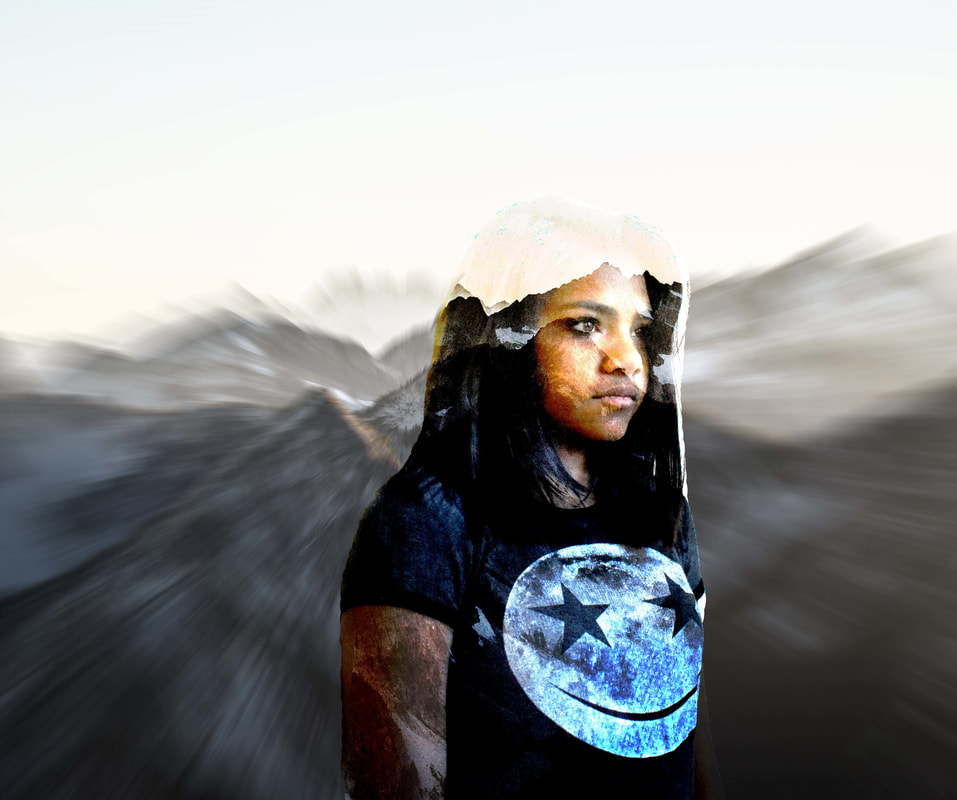
Underperforming/Partial student project examples
December 5th and 6th
GOAL: Students will work towards creating their double exposure project, utilizing different editing techniques in photoshop, in order to communicate a message/theme/concept, etc., before reflecting on their work using a teacher-provided written form. AGENDA:
AGENDA:
INSTRUCTIONS ON CREATING THE FINAL POP ART SELFIE
December 12th and 13th
GOAL/OBJECTIVE: Students will create a finished and finalized 'Pop Art Selfie' project (due at the end of block day today), utilizing six images and altering colors, contrast, saturation, etc., before checking individual websites while referring to the checklist and publishing in preparation for our peer critique/grading on Friday. AGENDA:
| ||||||||||||


December 14th
December 18th - FINAL EXAM TIME!
*please check google classroom for Final Exam instructions! |

|
|
January 7th - Welcome Back!
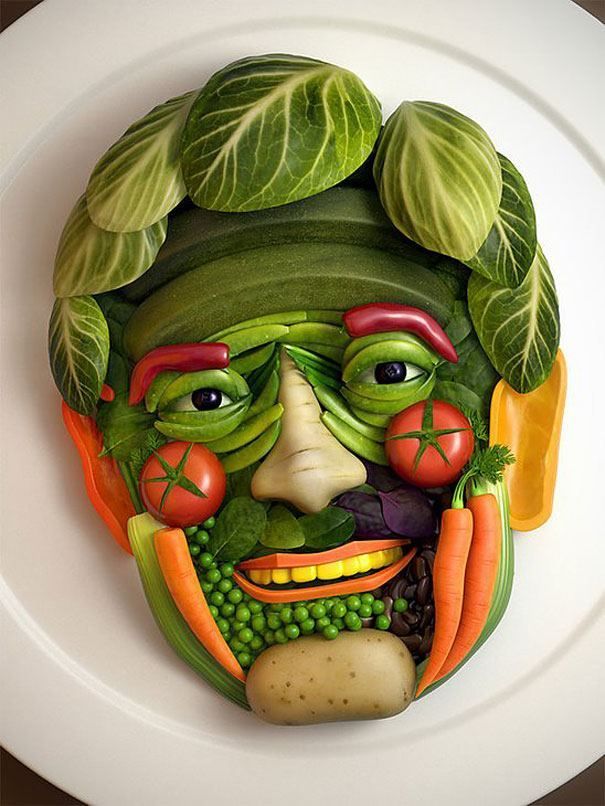
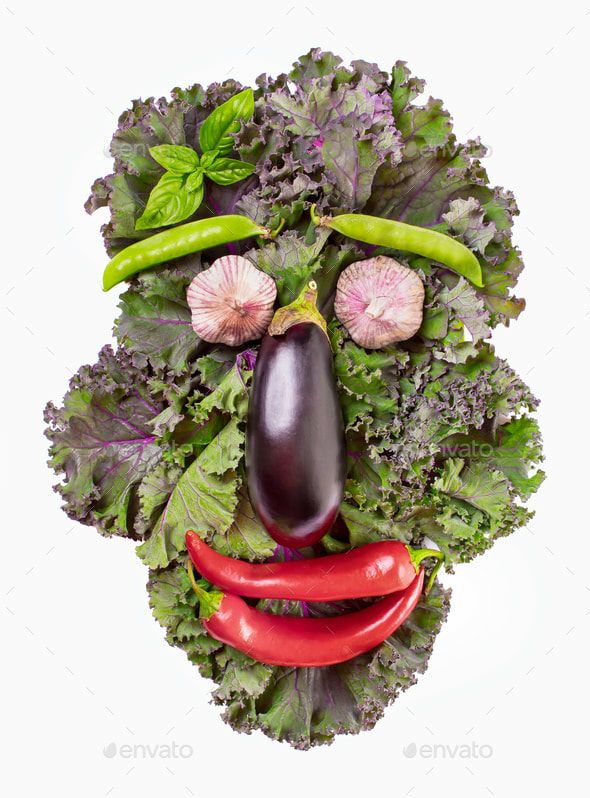
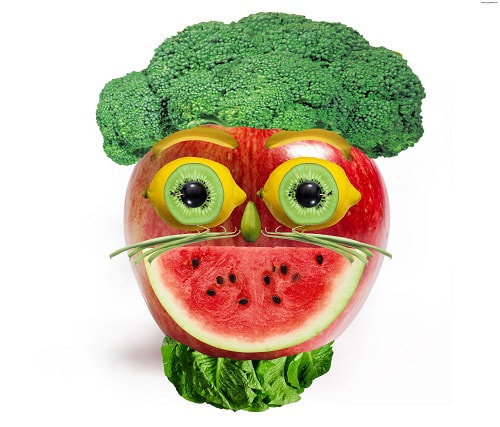
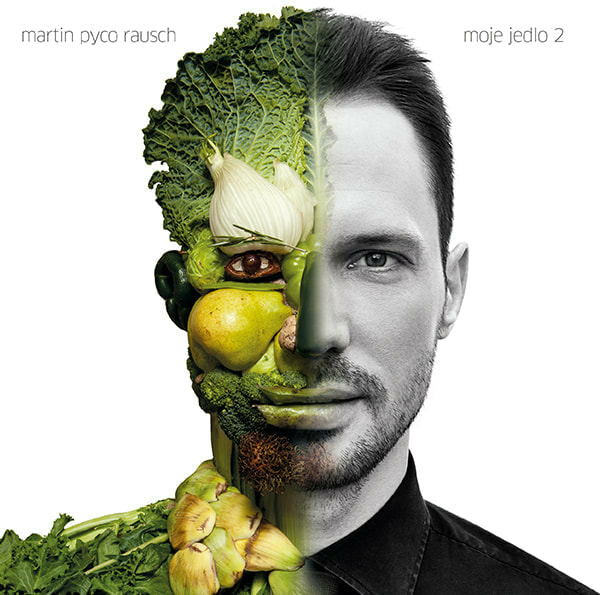
Veggie Face Assignment: Learning objective: Students will create a face made out of vegetables in Adobe Photoshop, using images and photographs, to showcase their understanding of using Photoshop masks and layers in a creative way. How to get started:
|
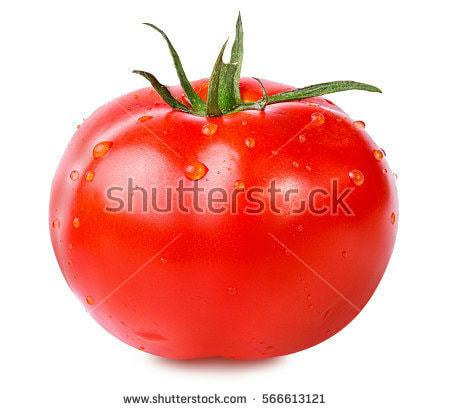
Example of an image with a water-mark. DO NOT use something like this!
As a reminder, these two sites are great for royalty-free, high resolution images: pexels.com & unsplash.com |

Video Tutorial
|
January 8th
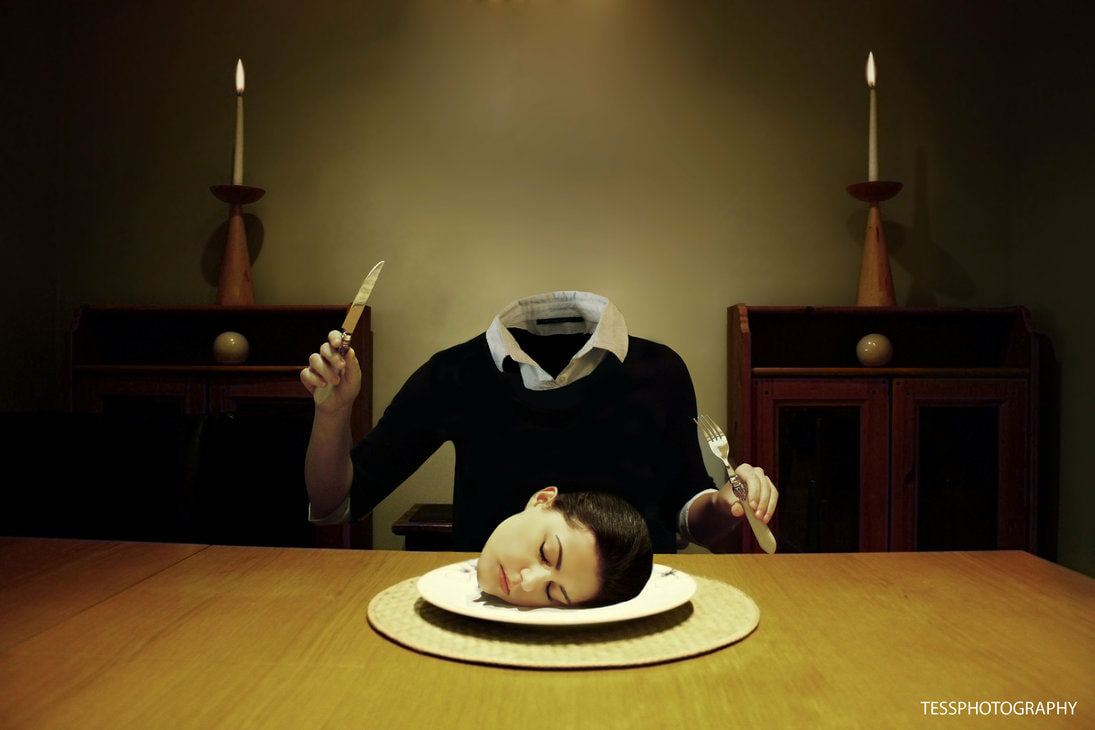
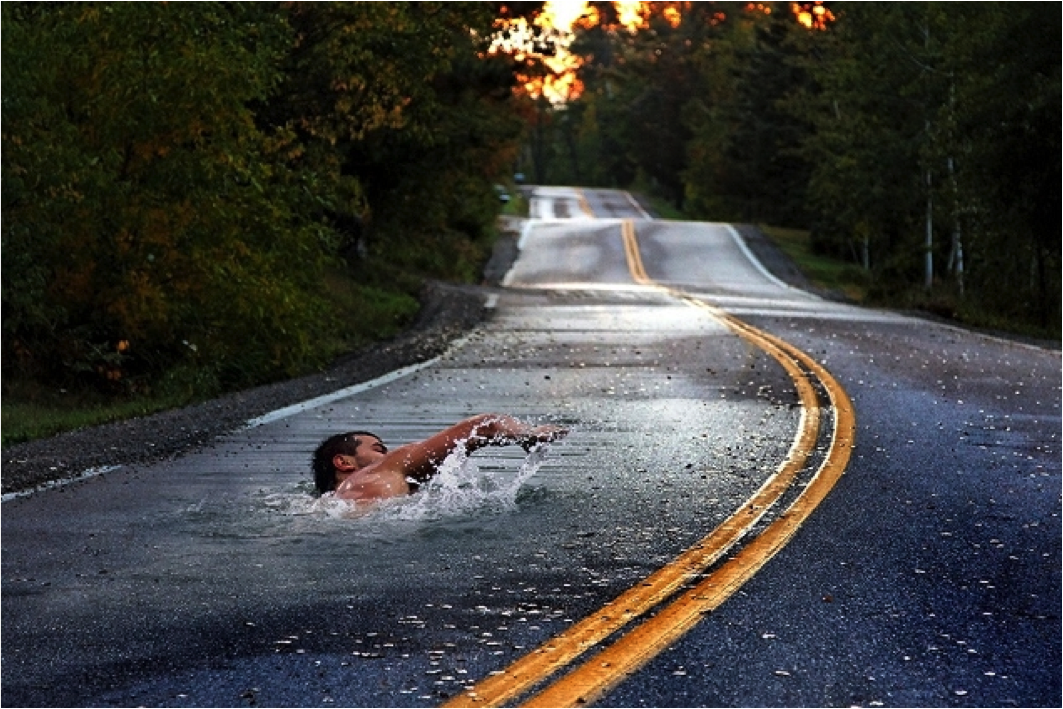
Learning Objective: Students will explore the internet and collect images that inspire them as part of the creative process for the 'impossible photography' assignment, after completing the 'veggie face' project and turning in. AGENDA:

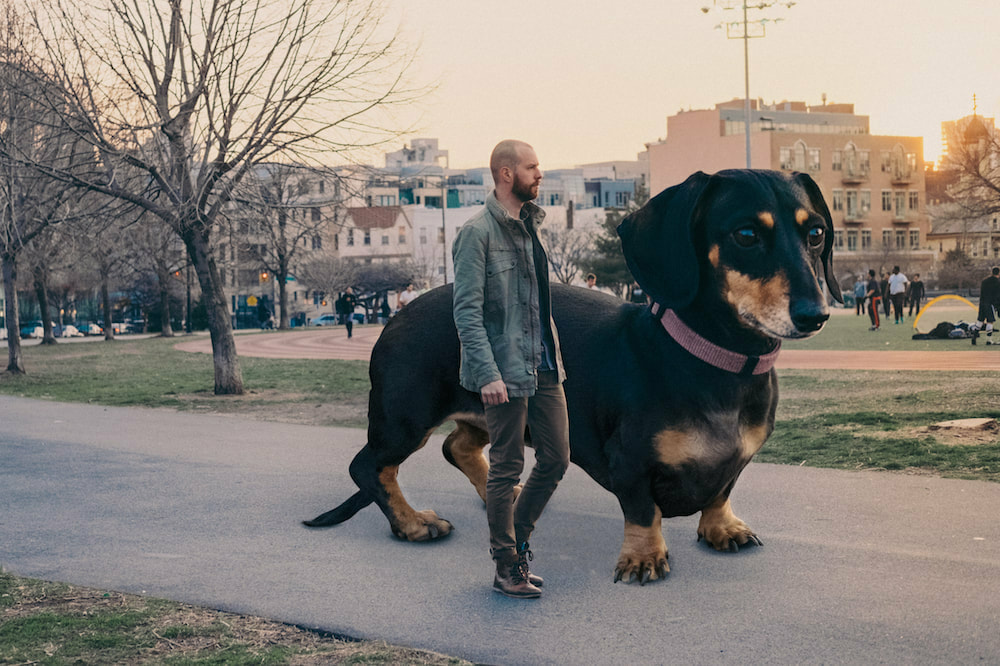
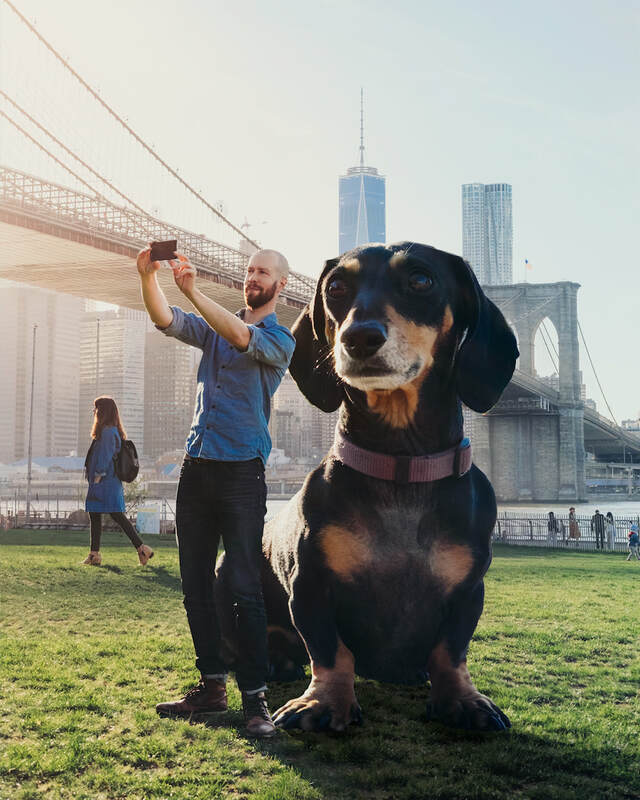
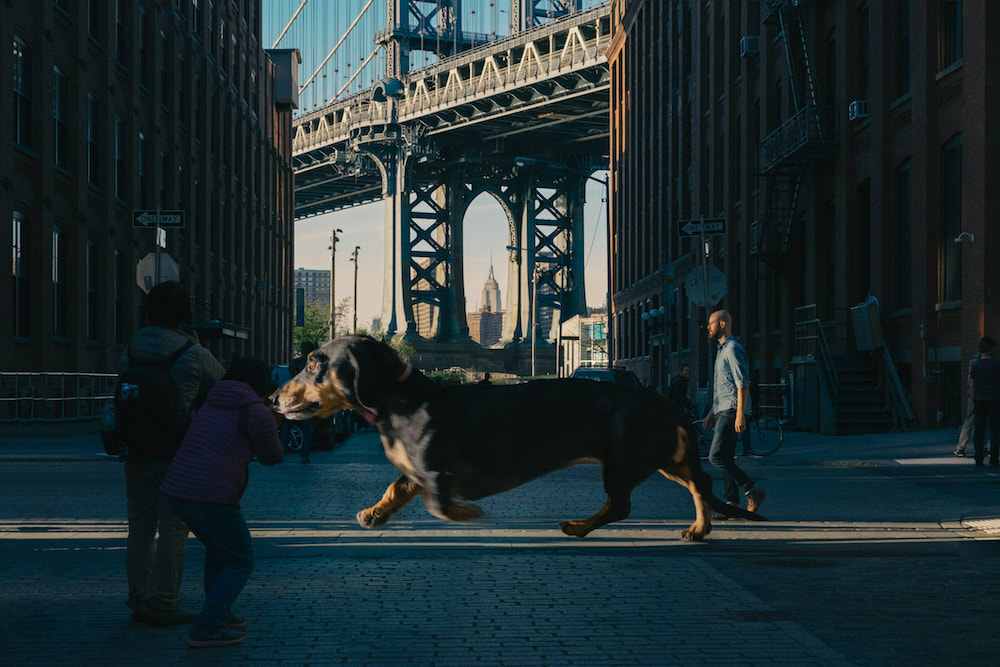
Lara Zankoul, The Unseen Series, 2013
AGENDA:

Requirements for the mini-dream scene project:
January 11th
Learning Objective: Students will create a mini-dream scene composite in Photoshop (due at the end of class) using masks and layers. and include foreground, middle ground, and background to create a feeling of depth before reflecting on what they have learned this week by answering questions on google classroom. Impossible Photography ProjectJanuary 14th
Learning Objective: Students will create TWO photo composites in Photoshop using masks and layers to create an "impossible dream scene." Using their own photographs supplemented with online images, the scene will focus on the compositional element of foreground, middle ground, and background to create a feeling of depth. You will turn in:
If you use photographs off the internet, they MUST be copy right free from websites such as: www.pexels.com www.unsplash.com CLICK HERE for a blog post that also has a TON of links to other copy right free stock photo websites. January 22nd
Learning Objective: Students will work towards creating TWO photo composites in Photoshop using masks and layers to create an 'impossible dream scene', before participating in a class critique, in order to give and receive feedback in completing our projects successfully. AGENDA:
January 25th
Learning Objective: Students will reflect (writing) on their Impossible Photography project by responding to reflection questions and submitting answers on google classroom, before researching 'unifying elements in photography' and creating two google slides with 8+images. Reflection Questions to be answered in COMPLETE SENTENCES:
For your two unifying slides: ONE element/principle for each slide.
AGENDA:

Using Adobe InDesign to put your grid together...

You will create a 9 x 9 grid using the InDesign template provided.
You will save both versions as .jpegs and .PDF to turn into Google Classroom.
January 30th & 31st
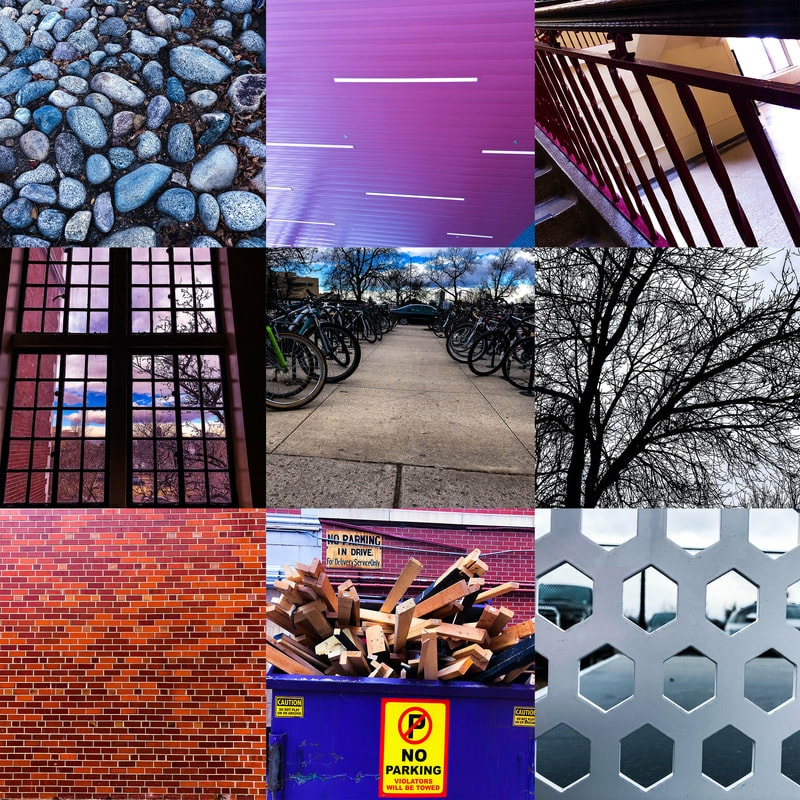
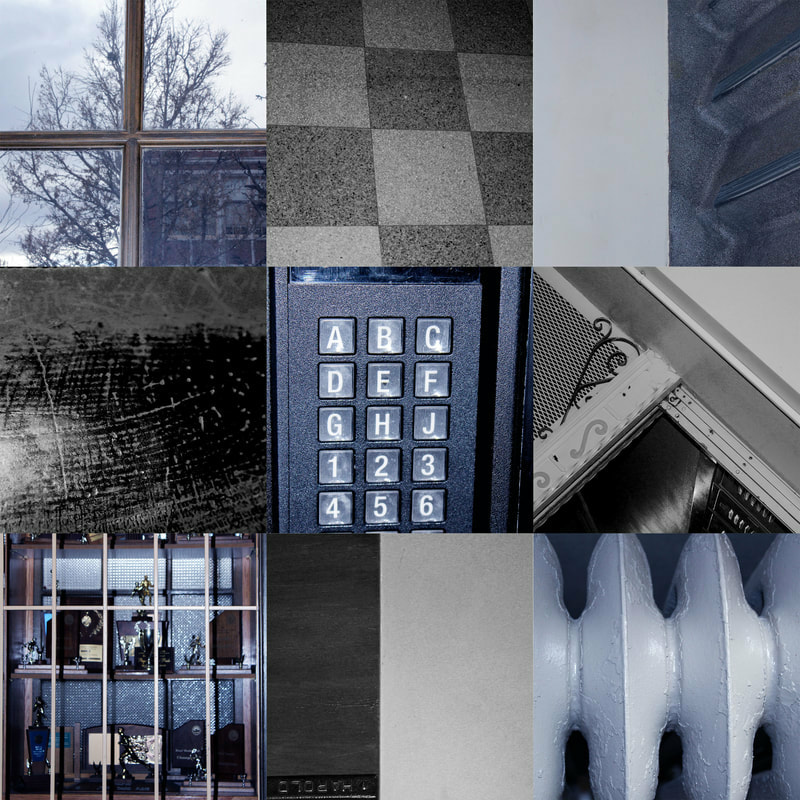
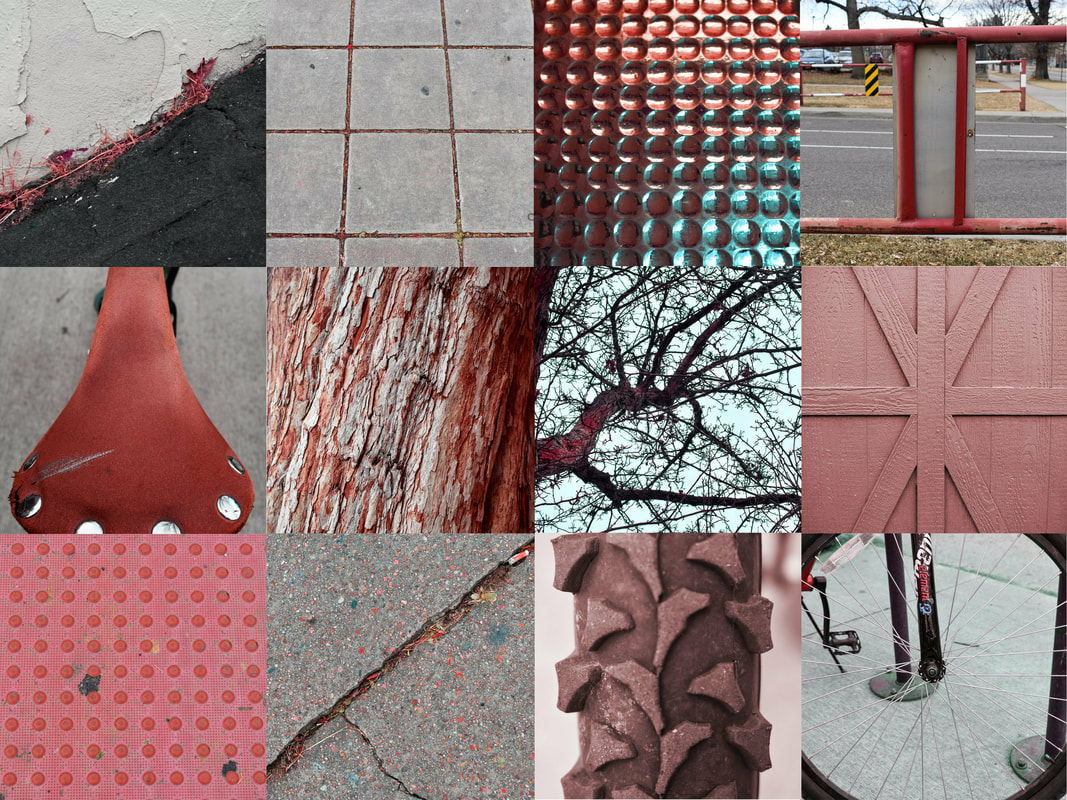
Learning Objective: Students will continue creating a "photo grid" artwork that focuses on the principles of composition by finding abstract images in the environment around them to capture with their camera, before using Photoshop editing techniques to create a feeling of overall unity in their grid. Can you guess which element/principle is featured in each slide?
Done Early? Please check your weebly site and update accordingly
Google Slide Research - Find FIVE examples of juxtaposition/contrast in photography and state the theme for EACH. See example below:
February 6th and 7th
Learning Objective: Students will complete the 'photo safari grid' project and reflection and turn in on google classroom (due at the end of class today), before researching juxtaposition in photography in order to gain an awareness, appreciation, and understanding of concepts and themes in preparation for our photo shoot next week. February 15th - I'M SO HAPPY TO BE BACK IN SCHOOL! Let's try to 're-acclimate' today :o)
Learning Objective: Students will continue researching juxtaposition in photography and work towards creating a google slide show on five examples with images and explanations of themes, concepts and ideas before completing the shared planning sheet in preparation for our photo shoot next week. Projects that should already be completed and turned in:
February 19th
Learning Objective: Students will complete the 'juxtaposition planning sheet,' comprised of three themes/concepts, and turn in on google classroom, before receiving feedback and taking photos for their project and editing using photoshop. February 20th and 21st
Learning Objective: Students will complete the 'juxtaposition planning sheet,' comprised of three themes/concepts, and turn in on google classroom, before receiving feedback and taking photos for their project and editing using photoshop. February 22nd
Learning Objective: Students will continue working towards creating their 'juxtaposition in photography' project, capturing images and editing using photoshop, in order to communicate a chosen theme, concept, or message after completing their planning document and receiving feedback from the teacher.
February 26th
Learning Objective: Students will finishing editing and turn in THREE images for the juxtaposition project, after participating in a class critique, in order to give and receive feedback in completing projects successfully.
*** DENVER TEEN MOP SHOW ENTRIES DUE! - denvermopteenshow.weebly.com
Facial Recognition Video - 'A Face in the Crowd' (If watching on your own, jump to 16:46 in the video)
After the video - Get in groups of three and discuss the following:
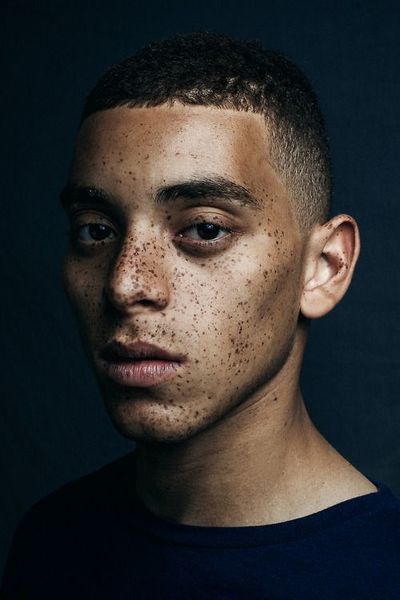
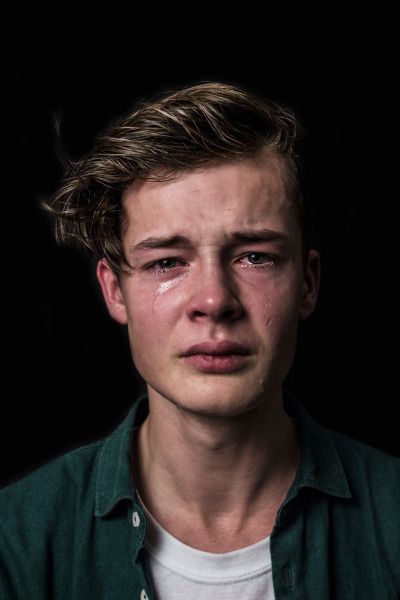
Google Slide Research on Studio Portraits
Create TWO slides showcasing studio portraits and varying emotions:
Some ideas of tutorials you could search for & use:
|
Create a Google Slide of 10+ images that demonstrates the concept of impossible photography. Turn in on Google Classroom.
Artists to explore:
Helpful Search Keywords:
January 9th/10th - Block Days
Learning Objective: Students will practice creating a mini-dream scene composite in Photoshop using masks and layers. The scene will focus on the compositional element of foreground, middle ground, and background to create a feeling of depth. Create a document that is 6 x 6 inches in Adobe Photoshop.

AGENDA:
Due TODAY 1/14:
Grading criteria: Impossible Photography Project:
Deadlines and Due Dates:
-Critique on Tuesday, January 22nd. -This critique will be worth POINTS. You must have at least 1 photo complete to receive feedback on and get participation points. -Project due: End of block day January 23-24th. January 15th
Learning Objective: Students will create TWO photo composites in Photoshop using masks and layers to create an "impossible dream scene." Using their own photographs supplemented with online images, the scene will focus on the compositional element of foreground, middle ground, and background to create a feeling of depth. January 16th and 17th
Learning Objective: Students will continue creating TWO photo composites in Photoshop using masks and layers to create an "impossible dream scene." Using their own photographs supplemented with online images (extra credit), the scene will focus on the compositional element of foreground, middle ground, and background to create a feeling of depth. January 23rd & 24th
Learning Objective: Students will createTWO photo composites in Photoshop using masks and layers to create an 'impossible dream scene', before submitting and turning in on google classroom at the end of the period.

Unifying Elements Slide Examples:
January 28th
Learning Objective: Students will continue researching 'unifying elements in photography' and creating two google slides with 8+images. in preparation for a 'photo safari' challenge capturing objects and images around them. January 29th Learning Objective: Students will create a "photo grid" artwork that focuses on the principles of composition by finding abstract images in the environment around them to capture with their camera, before using Photoshop editing techniques to create feeling of overall unity in their grid. Directions:
One week grace period ends: Tuesday, February 12th Grid Project Examples
Watch the video below to get some editing tricks, and how to properly place your images in Adobe InDesign.

You will create a 9 x 9 grid as well as a key with the symbols in the second InDesign document provided.
AGENDA:
February 4th
Learning Objective: Students will continue creating a "photo grid" artwork that focuses on the principles of composition by finding abstract images in the environment around them to capture with their camera and using Photoshop editing techniques to create a feeling of overall unity in their grid, before reflecting on their work using a teacher-provided questionnaire. Reflection Questions (Answer on Google Classroom)
February 5th
Learning Objective: Students will be introduced to the next unit - 'juxtaposed and contrasting photography', by discussing as a class: expectations, ideas and themes for projects, and viewing examples online, before finding images to create google slides for inspiration.
Juxtaposition in Photography - Click HERE Juxtaposition Planning sheet - Click HERE to download February 8th
Learning Objective: Students will continue researching juxtaposition in photography and work towards creating a google slide show on five examples with images and explanations of themes, concepts and ideas before completing the shared planning sheet in preparation for our photo shoot next week. Students: if you finish your google slides AND planning document with ALL requirements, check your weebly site: upload any projects/reflections (up to photo grid) - Now is also a good time to check your inspiration page and add to it (images, videos, websites are all great to include!) Projects that need to be completed BEFORE you can start shooting for the Juxtaposition Photo Project:
In order to check out a camera and take photos, you MUST FIRST turn in your planning sheet and receive feedback from me! Be specific and thorough when filling out your planning document!
**End of 6 week grading period is THIS FRIDAY (FEBRUARY 22nd). ALL work up until the Juxtaposition Planning Sheet will be graded - GET IT IN!!!
February 25th
Learning Objective: Students will continue working towards creating their 'juxtaposition in photography' project, capturing images and editing using photoshop, in order to communicate a chosen theme, concept, or message before participating in a class critique (Tuesday). AGENDA:
February 27th and 28th
Learning Objective: Students will finalize and turn in their juxtaposition project and reflect on their work through a written reflection on google classroom, before watching a film on facial recognition and being introduced to our next unit on portrait photography. Juxtaposition in Photography Reflection
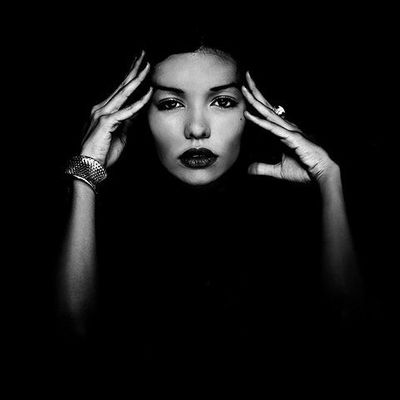
Introduction to Studio PortraitsMarch 1st
Learning Objective: Students will explore ideas and examples of studio portraits by researching and creating two google slides which showcase what they found and turning in on google classroom, before practicing using white balance on cameras in preparation for our photo shoot next week. AGENDA: While you are working I will come around and schedule studio portrait shoot times with you - think about WHO you want to photograph!
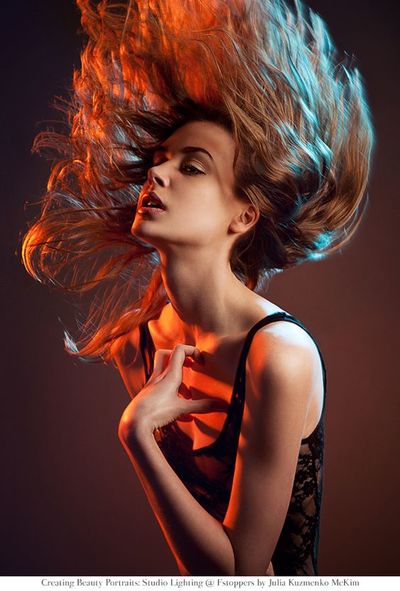
March 5th - Studio lighting demonstration day
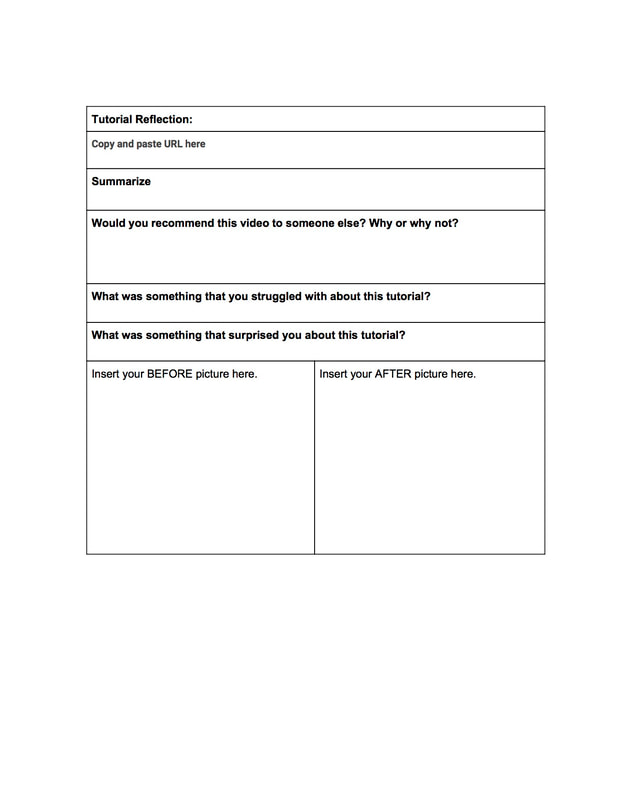
Learning Objective: Students will complete 3 different Photoshop editing tutorials of their choice that relate to the portrait photography unit. Students will write a written reflection about their process and display their proficiency by creating a "before" and "after" photo. While the studio can only have one group at a time, you will work on completing THREE photoshop tutorials of your choice that relate to portrait photography. Choose 3 photo editing techniques of your choice! If you don't like any of these suggestions, find something else you prefer on youtube! EACH tutorial form will be worth 20 points. That's 60 points total for all three!
Trust me, you don't want a zero on this. |


March 6th
Learning Objective: Students will continue to work towards completing 3 different Photoshop editing tutorials of their choice that relate to the portrait photography unit. Students will write a written reflection about their process and display their proficiency by creating a "before" and "after" photo. Those of you who are shooting and using the gallery today:
March 11th
Learning Objective: Students will continue to work towards completing 3 different Photoshop editing tutorials of their choice that relate to the portrait photography unit. Students will write a written reflection about their process and display their proficiency by creating a "before" and "after" photo and turn in on google classroom. AGENDA:
March 15th
Learning Objective: Students will work towards shooting and editing 2-3 final studio portraits, using the tools and techniques learned from their tutorial assignments and after submitting their contact sheet from their photo shoot.
Photo Shoot Schedule for Today (make-ups from Wednesday/Thursday)
Friday: 3/15
March 18th
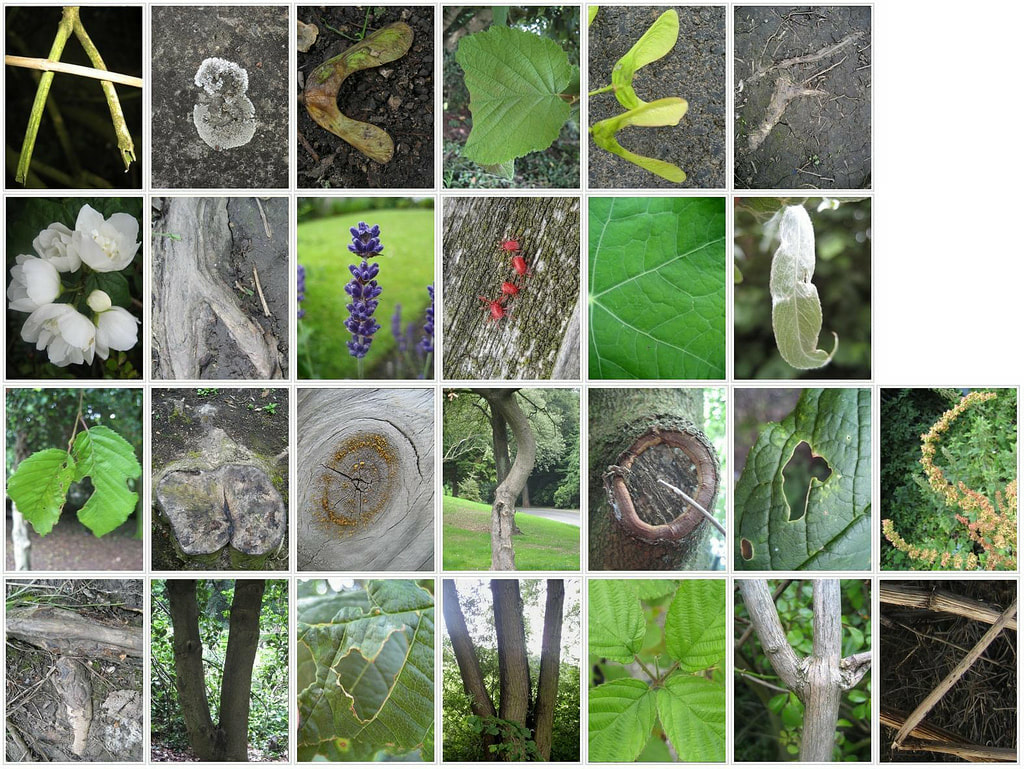
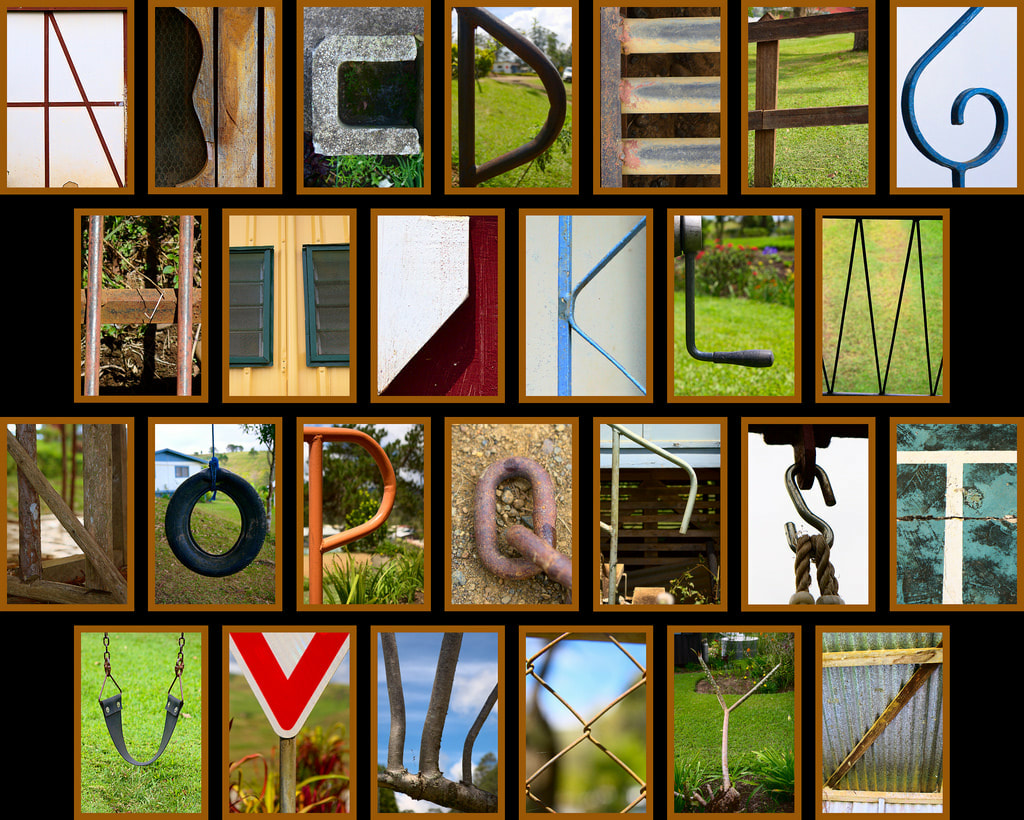
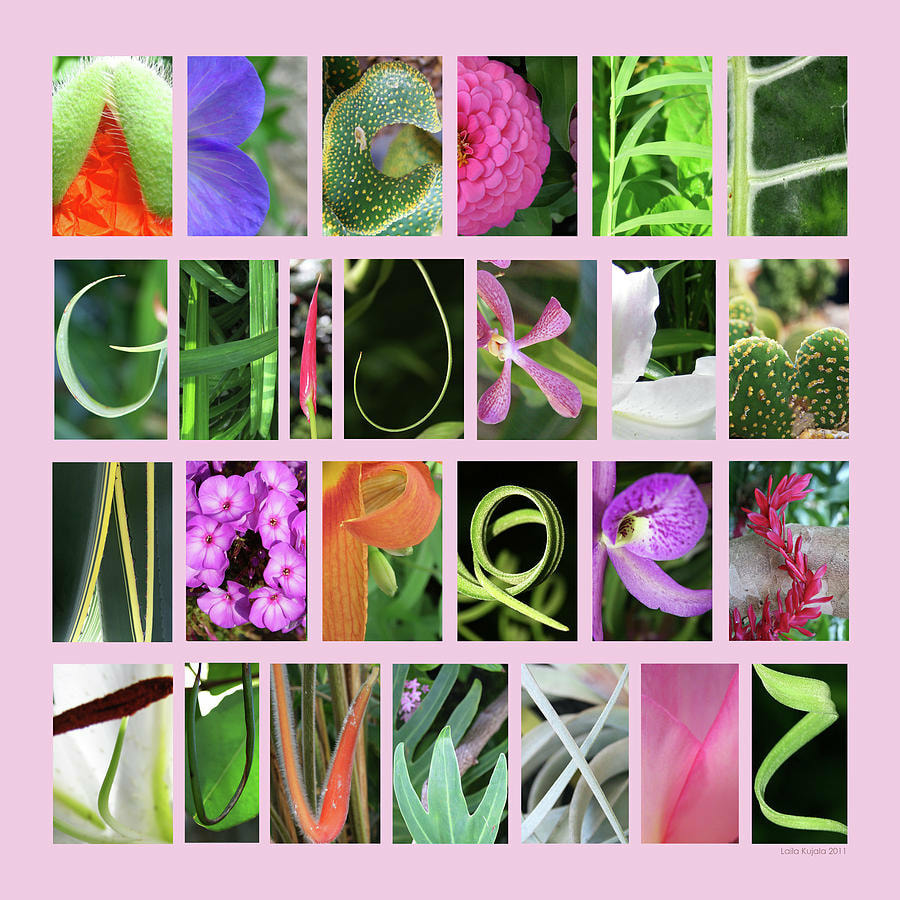
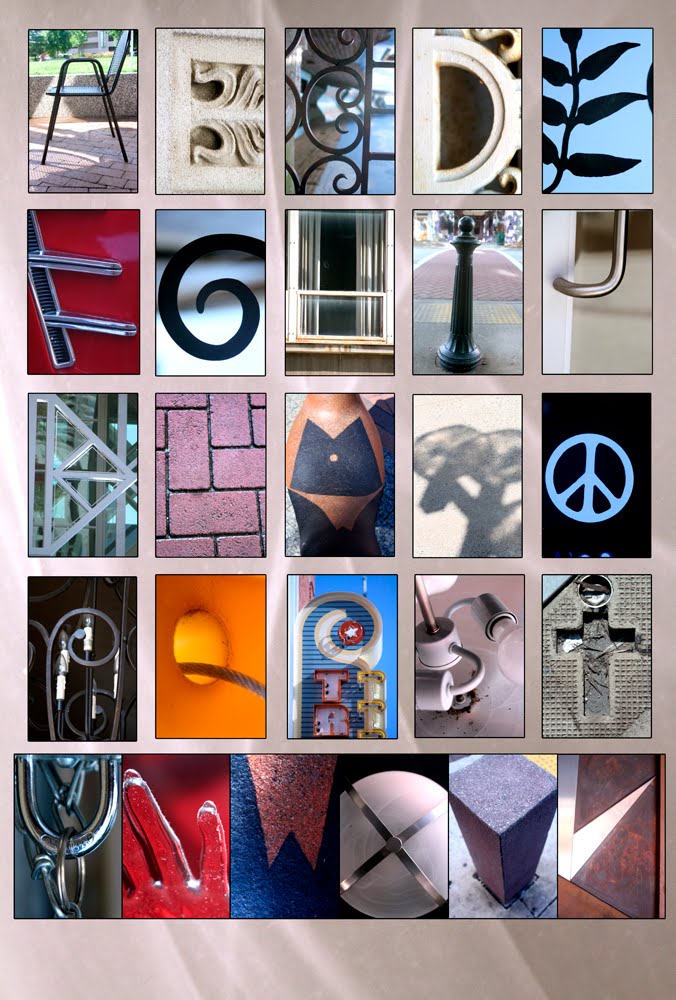
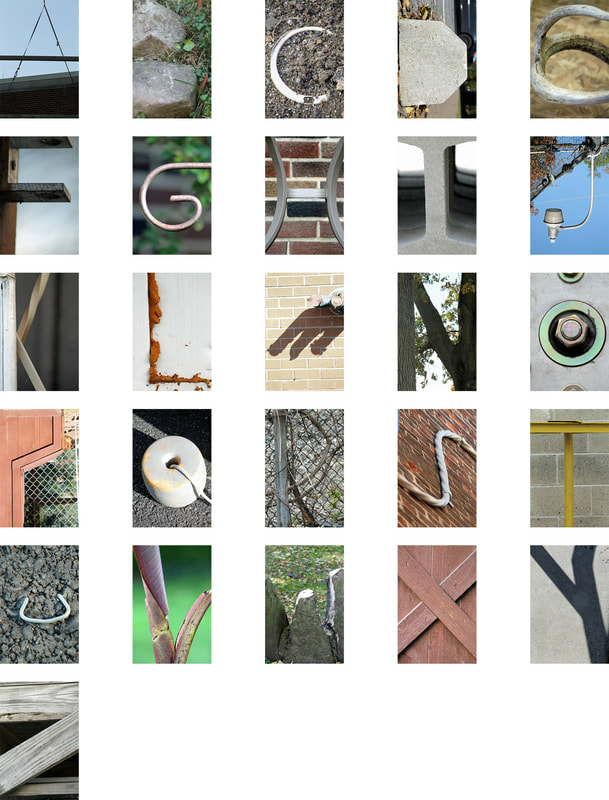
Learning Objective: Students will work towards editing 2-3 final studio portraits (due at the end of block day), using the tools and techniques learned from their tutorial assignments after giving and receiving feedback in a student critique session (verbal and written) using the provided form. Once your 2-3 Portrait Photos AND Reflection have been submitted, review expectations for next photography assignment this week: Alphabet Scavenger Hunt:
You will get creative by finding letters of the alphabet in everyday life.
|
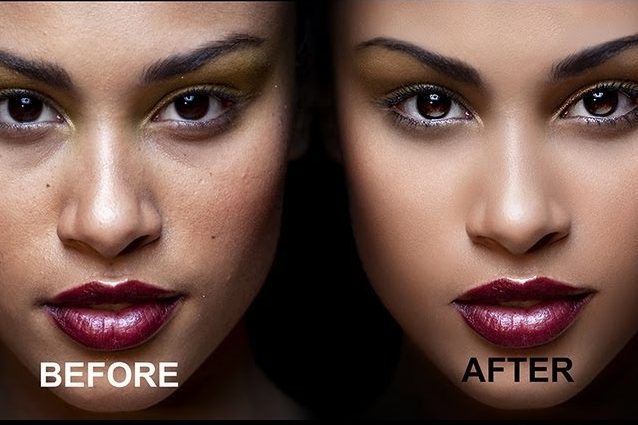
Photo Shoot Schedule for this week:
Tuesday 3/5 :
March 7th and 8th
Learning Objective: Students will continue to work towards completing 3 different Photoshop editing tutorials of their choice that relate to the portrait photography unit. Students will write a written reflection about their process and display their proficiency by creating a "before" and "after" photo. Photo Shoot Schedule for this week:
Monday 3/11:
March 12th
Learning Objective: Students will submit three reflections on tutorials they watched for their portrait photography unit, before shooting and editing portrait photos in order to understand studio lighting and portrait editing techniques.
Portrait Photography Reflection Questions:
Warm Up Activity:
What feedback and/or suggestions would you give this photographer in editing and finalizing this portrait shot? ANSWER ON GOOGLE CLASSROOM 
|
View examples below (click to make larger)

|
March 19th
Learning Objective: Students will continue editing 2-3 final studio portraits (due at the end of block day), using the tools and techniques learned last week from their tutorial assignments, after reviewing peer feedback from yesterday's critique session (verbal and written), and finally reflecting on their work by answering the written reflection questions on google classroom. Once your 2-3 Portrait Photos AND Reflection have been submitted, review expectations for next photography assignment this week - The Alphabet Scavenger Hunt! March 20th and 21st
Learning Objective: Students will edit and submit 2-3 final studio portraits (due at the end of class today), using photoshop editing tools and techniques of their choice, after reviewing peer feedback from yesterday's critique session (verbal and written), and finally reflecting on their work by answering the written reflection questions on google classroom. Once your 2-3 Portrait Photos AND Reflection have been submitted, review expectations for next photography assignment: The Alphabet Scavenger Hunt! ***STUDENTS: THE GRACE PERIOD APPLIES TO ALL PROJECTS - YOU ONLY HAVE ONE WEEK AFTER THE OFFICIAL DUE DATE TO GET WORK TURNED IN. ANY WORK SUBMITTED AFTER THE GRACE PERIOD ENDS WILL NOT BE GRADED!!!! IT IS YOUR RESPONSIBILITY.***
April 1st - END OF 6 WEEK GRADING IS FRIDAY!
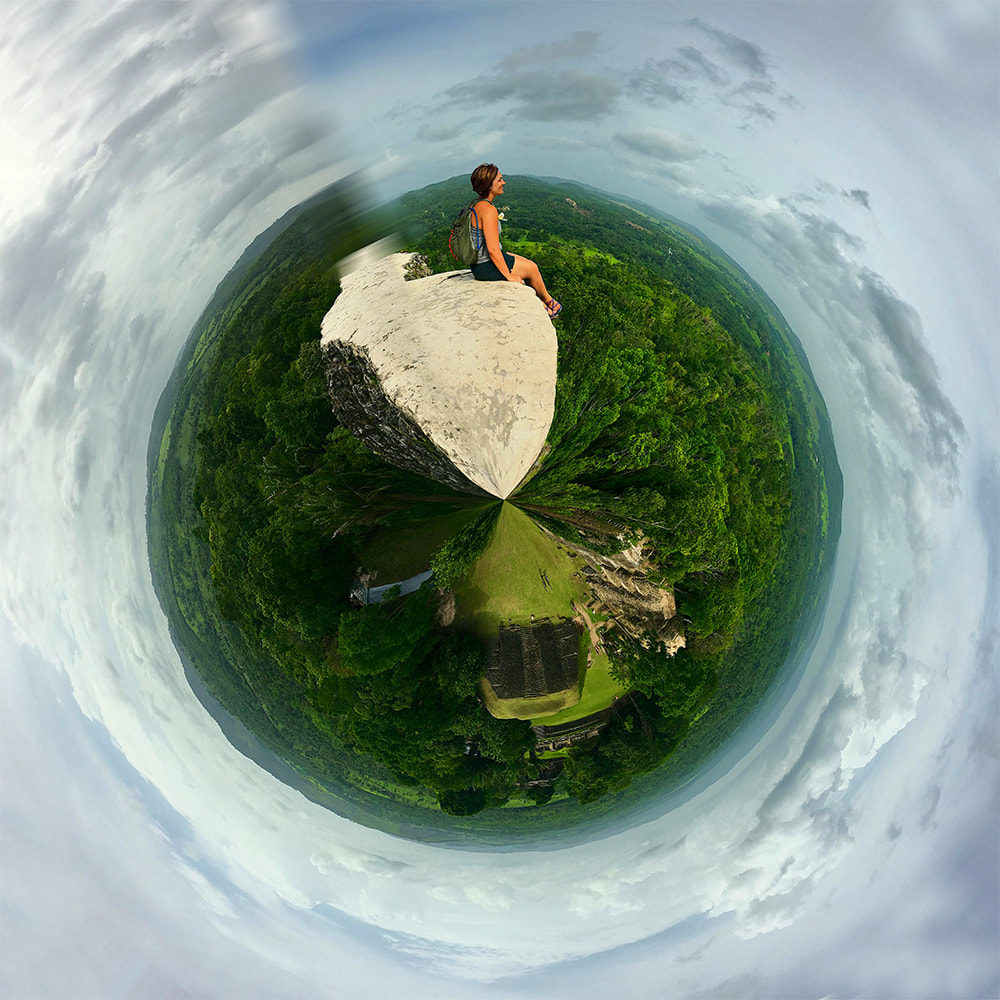
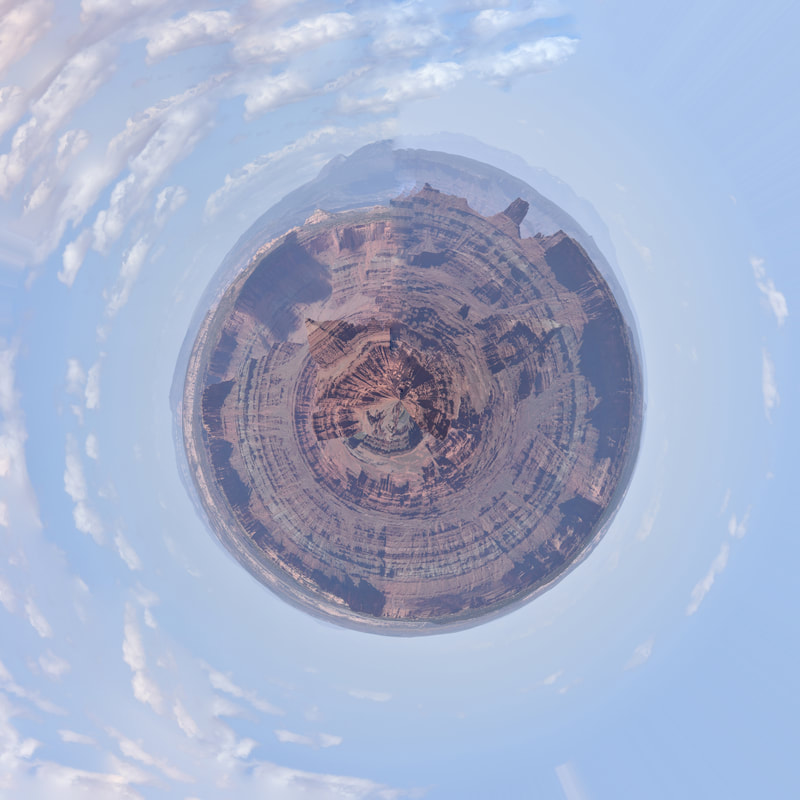
Learning Objective: Students will be introduced to the 'tiny planet' assignment, focusing on using balance in a panorama photo, as well as editing techniques in Photoshop to create an effective project.
|
CALL FOR ENTRIES! YES, ANOTHER PHOTO SHOW!!!
CLICK HERE TO ENTER YOUR BEST PHOTO TO THE DPS PHOTO SHOW: Read Guidelines and click on 'ENTRY FORM' at the top. PLEASE MAKE SURE YOU ARE FOLLOWING DIRECTIONS CLOSELY:
March 22nd
Checklist of work to complete and submit:

|
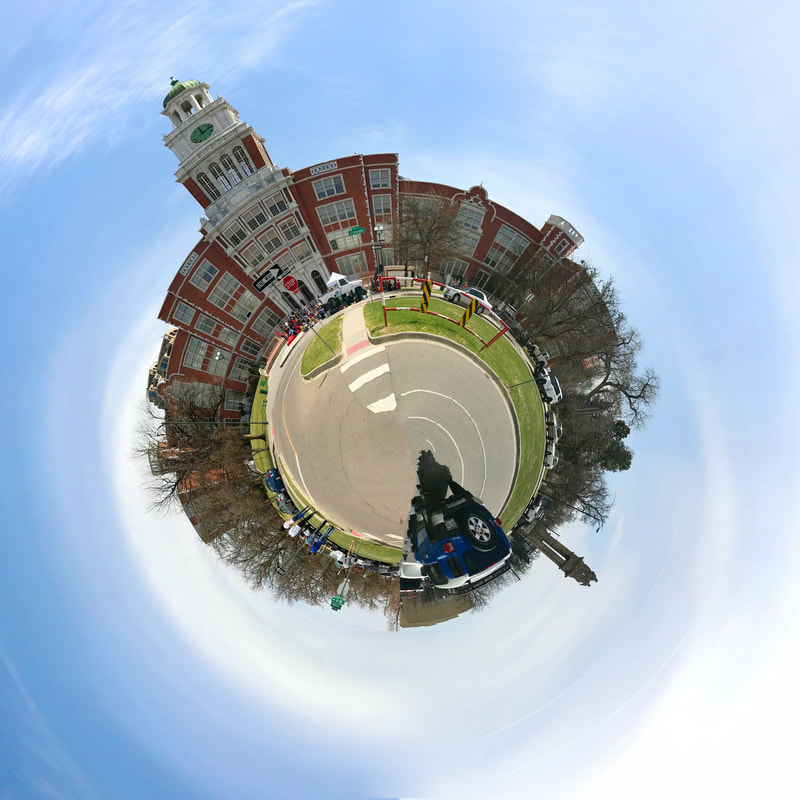
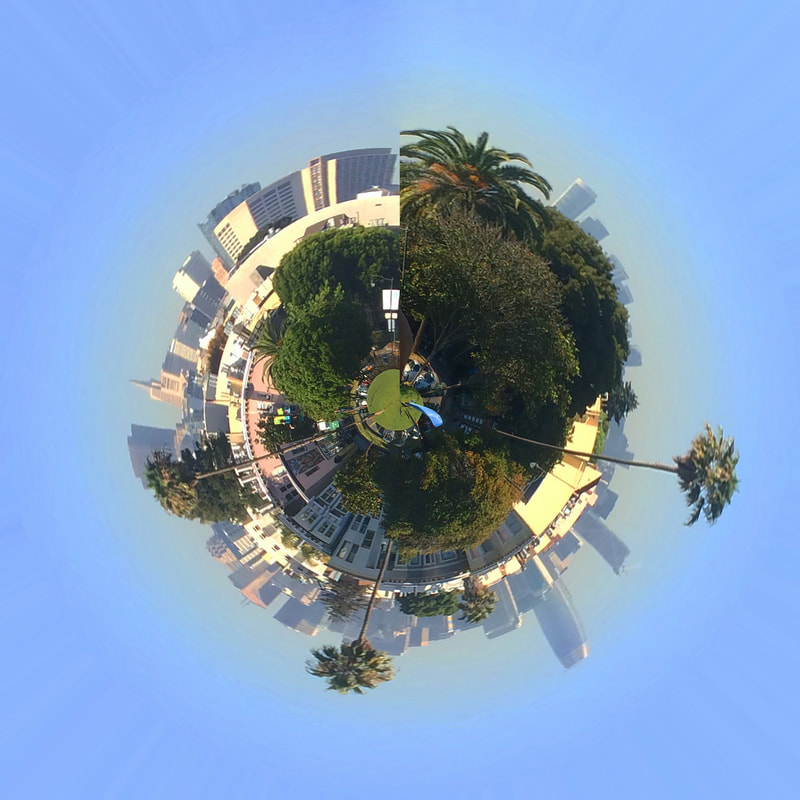
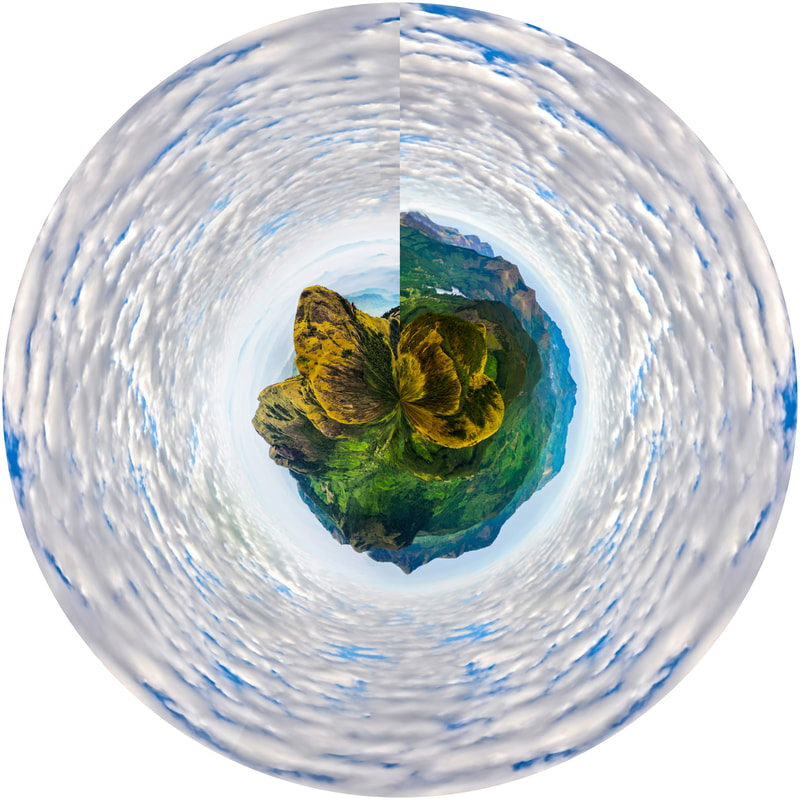
Examples of tiny planets...
|

|
Past Student Projects
Tutorial Video
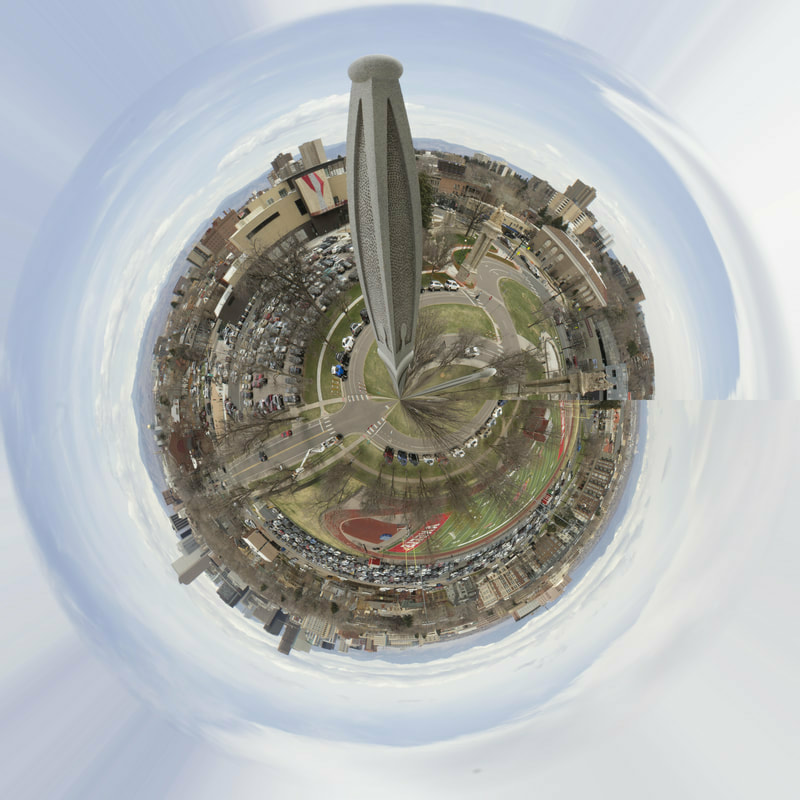
You want to adjust your horizon line so that it is even on both sides. You want it to be even on both sides so when the image wraps into a circle they match up.
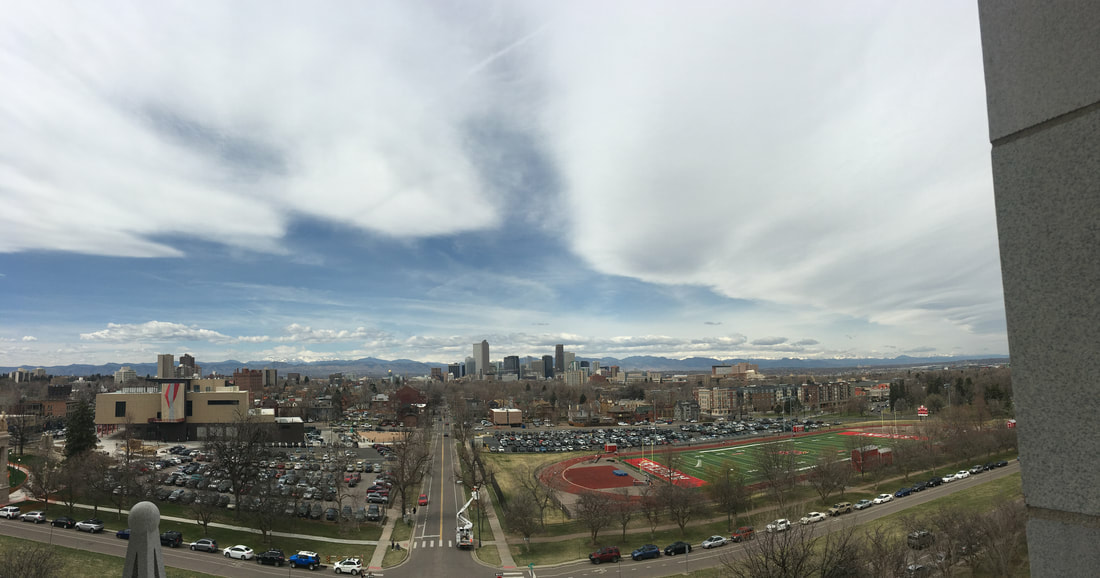
Be sure to crop out unnecessary elements. This student cropped out the side of the building on the right hand side of her photo and then created:

Have fun with it! Give your tiny planet some crazy colors to make it more visually interesting (if you want to).

My Panorama Shot - To My Tiny Planet

April 3rd and 4th - BLOCK DAYS
Learning Objective: Students will work towards creating the 'tiny planet' project, utilizing three panorama photographs and using Photoshop editing techniques, referring to past project examples, tutorial videos, and the rubric, before participating in a peer feedback session in order to be successful.
April 5th
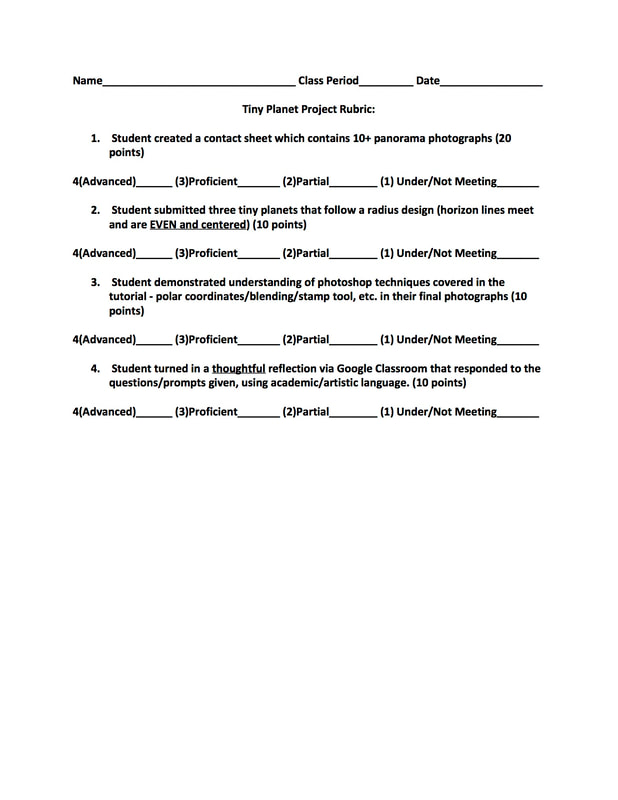
Learning Objective: Students will create three 'tiny planets' and submit to google classroom, after utilizing panorama photographs and Photoshop editing techniques, referring to past project examples, tutorial videos, and the rubric, before reflecting on their work using a teacher provided document. THANK YOU FOR PARTICIPATING IN THE PEER FEEDBACK SESSION! Information for the Visual Poster should include:
|
Tips and tricks...
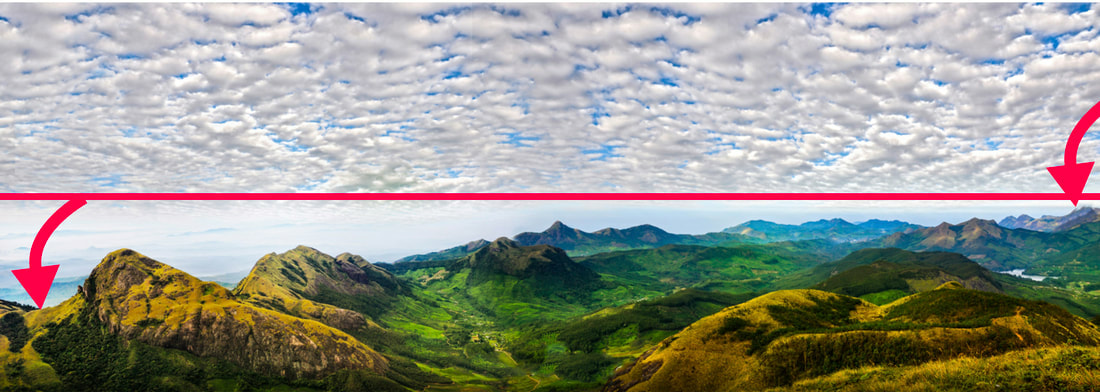
Note: You can crop your photo so that the horizon line is more even.
Note: This is an example of what you DON'T want. See how the planet doesn't line up into a circle? That's because the horizon line wasn't even in the original photo.
MORE OF WHAT YOU DON'T WANT...
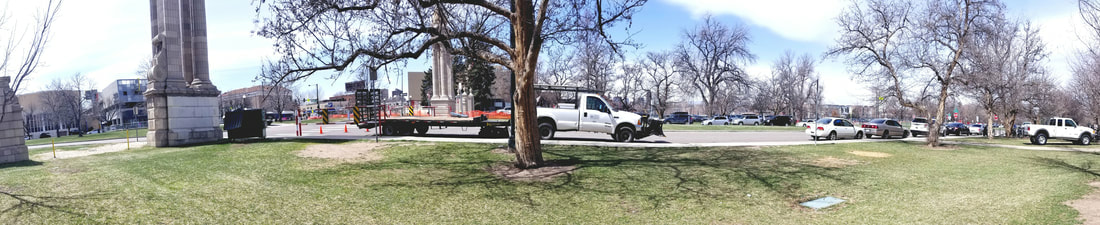

You don't want anything from the ground touching the top of your photo. See how the trees touch the top of the photo? They get stretched out and look crazy when the image gets wrapped into a tiny planet.
April 2nd
Learning Objective: Students will continue utilizing photoshop editing techniques and tutorials in order to create a 'Tiny Planet', using panoramic photographs. Mid Point Check and Feedback Session
Peer Feedback Session:
April 11th
Learning Objective: Students will be introduced to the next assignment, creating a visual poster, which should display an understanding of aperture and shutter, using a google slide and referring to the example below (in preparation for end of year assessment). Poster must have a cohesive look to its design.
Think about color, fonts, and type size. PROJECT IS DUE MONDAY 4/15 **End of Grace Period for Tiny Planets is TOMORROW (Friday 4/12)
April 11th
Learning Objective: Students will continue working towards creating a visual poster, which should display an understanding of aperture and shutter, using a google slide and referring to the example below (in preparation for end-of-year assessment).
|

April 15th
Learning Objective: Students will create a visual poster, which should display an understanding of aperture and shutter, as well as include the appropriate information listed above, using a google slide and referring to the example (in preparation for end-of-year assessment) TO BE TURNED IN AT THE END OF CLASS TODAY.
Learning Objective: Students will create a visual poster, which should display an understanding of aperture and shutter, as well as include the appropriate information listed above, using a google slide and referring to the example (in preparation for end-of-year assessment) TO BE TURNED IN AT THE END OF CLASS TODAY.
|
April 16th
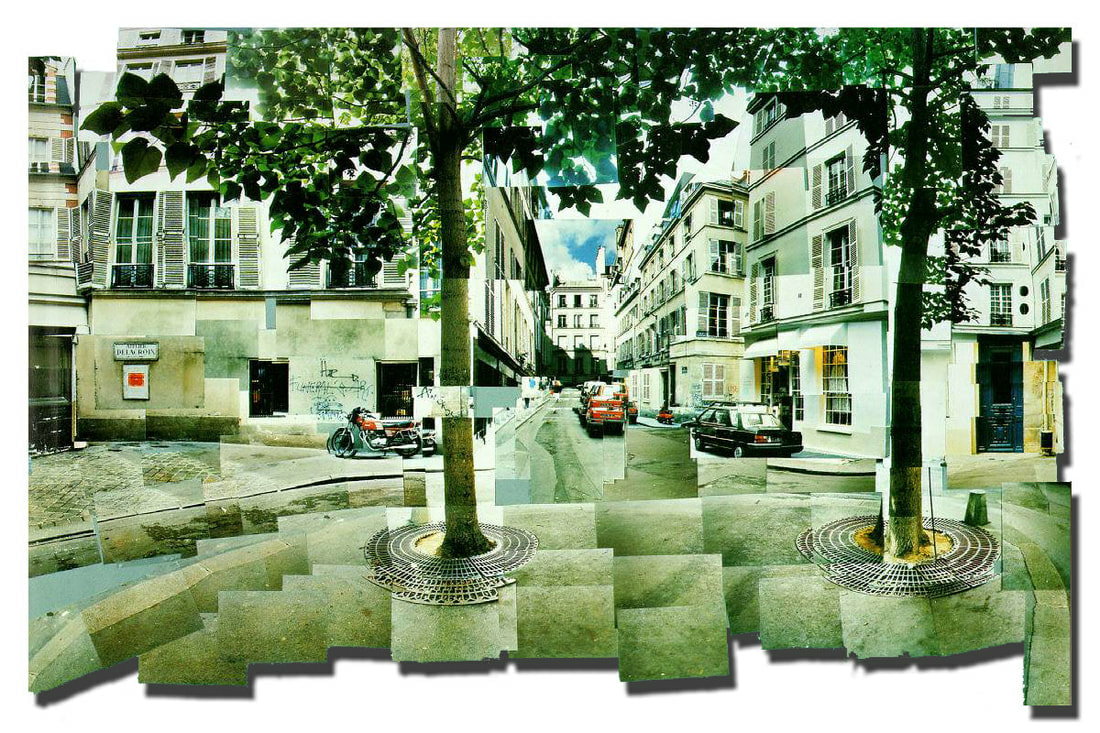
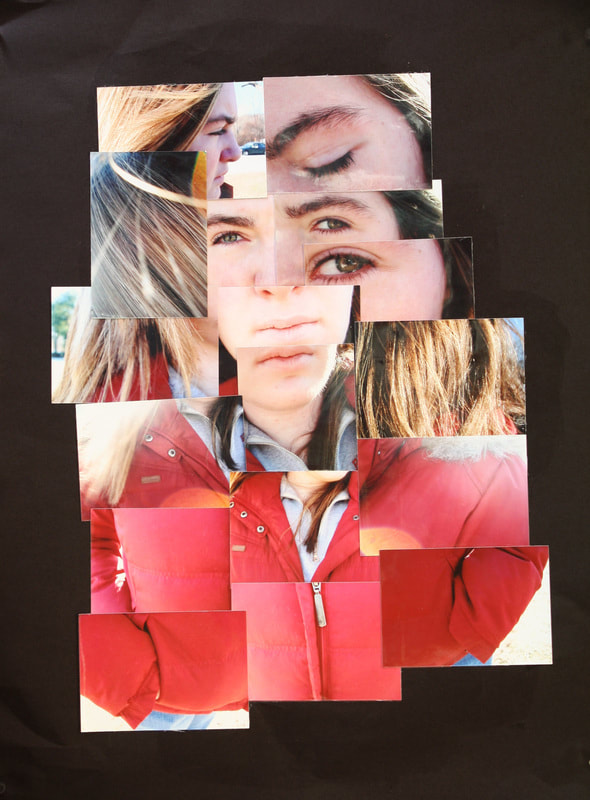
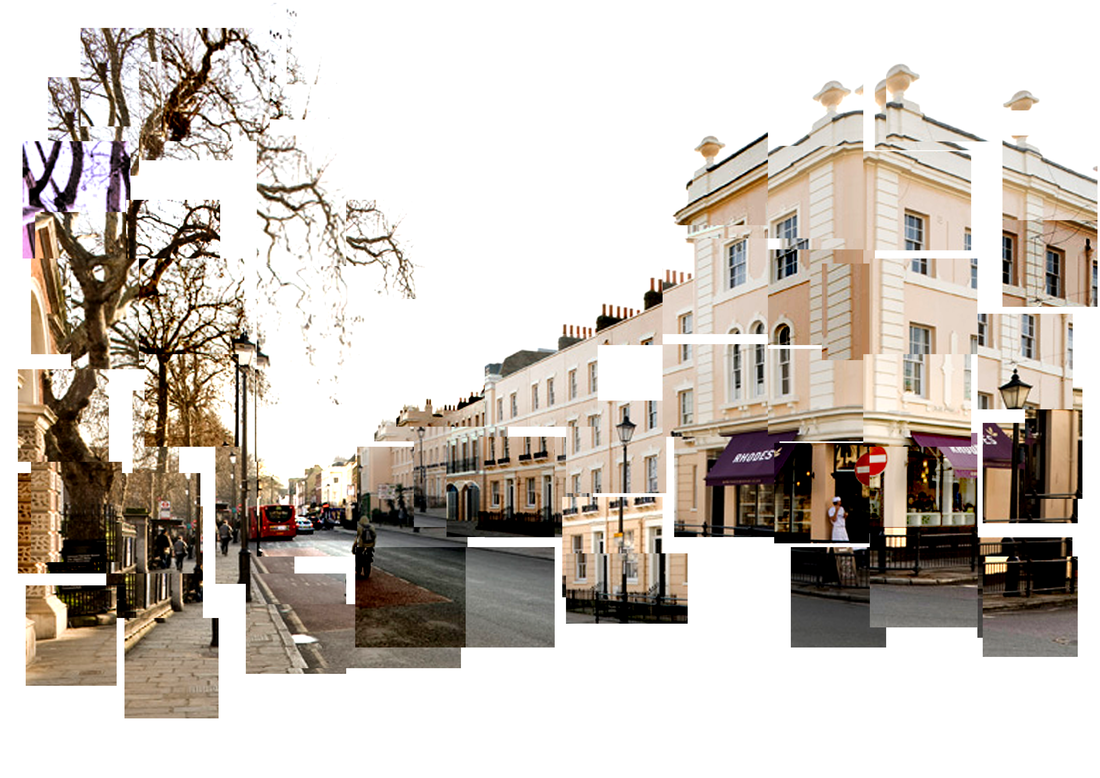
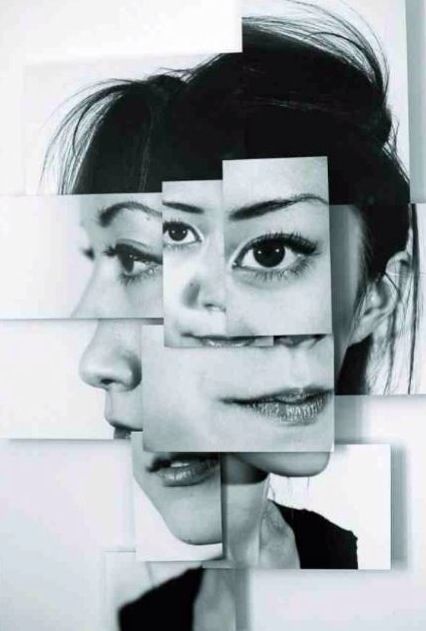
Learning Objective: Students will take a series of photographs from different angles and perspectives to create a photo joiner collage in the style of David Hockney, after reading and responding to information on Hockney as an artist
Watch this video first
How to make a Photoshop Action. This video will teach you how to batch edit all of the photos you took Watch this video second
How to put together your Hockney collage. This video will show you how to place your images into the document. |
Exploring themes for your Hockney Project:
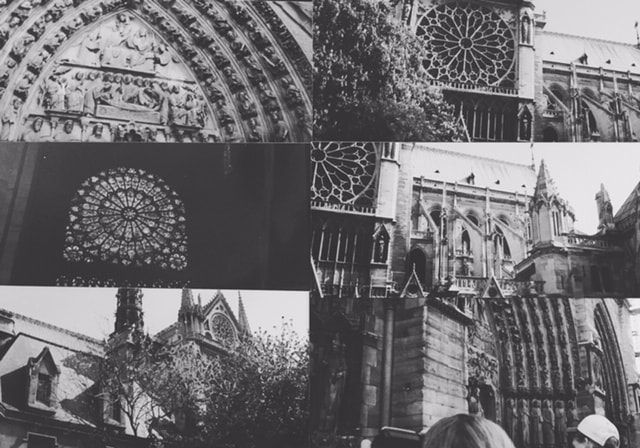
A very basic collage from panorama photos I took at Notre Dame in 1997 on a high school trip!
|


April 18th and 19th
Learning Objective: Students will continue working towards the 'David Hockney project' taking photographs, and using shared tutorials on best photoshop techniques to complete their work, after participating in a student-teacher questionnaire.
Learning Objective: Students will continue working towards the 'David Hockney project' taking photographs, and using shared tutorials on best photoshop techniques to complete their work, after participating in a student-teacher questionnaire.
- Review project components and steps for completing a practice David Hockney collage
- Refer to the rubric provided below on how you will be graded
- Practice creating a collage using images you took on Tuesday, using the tutorials I've shared with you.
April 22nd
Learning Objective: Students will continue working towards the 'David Hockney project' uploading photographs, and using shared tutorials on best photoshop techniques to complete their work, after practicing and developing ideas of themes/concepts within their work in order to communicate artistic intent.
Learning Objective: Students will continue working towards the 'David Hockney project' uploading photographs, and using shared tutorials on best photoshop techniques to complete their work, after practicing and developing ideas of themes/concepts within their work in order to communicate artistic intent.

Student A's project
|
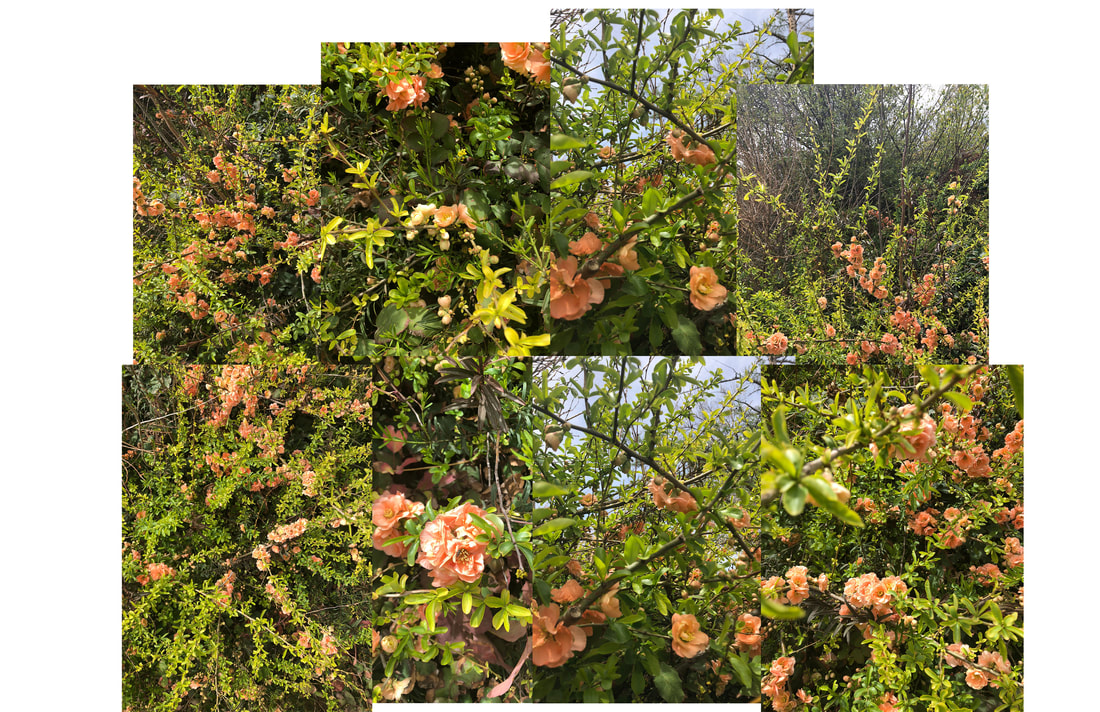
Student B's project
|
|
April 23rd
Learning Objective: Students will continue working towards the 'David Hockney project' , focusing on editing techniques and skills to communicate an idea/concept within their work - DUE DATE IS NO LATER THAN TUESDAY 4/30 April 26th
Learning Objective: Students will work towards creating a 'David Hockney collage project', using at least ten photographs in each of their two final images, focusing on editing techniques and skills to communicate an idea/concept within their work, before reflecting on their work using provided questions on google classroom.
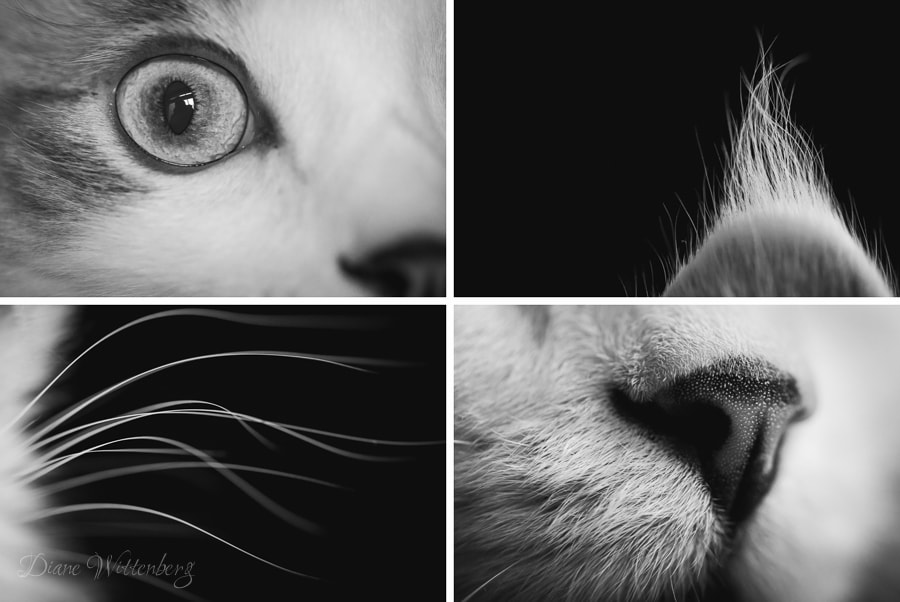
Examples of Photography Series


Wes Naman's Scotch Tape Portrait Series
May 1st and 2nd
Learning Objective: Students will plan for a mini photo series project, reviewing tutorials on editing techniques and processes from this year, exploring a thematic concept/unifying elements or subject matter to create their final 3-4 images, after completing a warm-up questionnaire on a photo series. |
April 24th and 25th
Learning Objective: Students will continue working towards the 'David Hockney collage project', using at least ten photographs in each of their two final images, focusing on editing techniques and skills to communicate an idea/concept within their work
Projects/Concepts/Techniques we Covered:
Point of View/Composition Aperture/Depth of Field Shutter/Motion Spooky Toning & Selective Color Impossible Photography Double Exposure Portraits Panoramas/Tiny Planets Hockney/Photo Joiner Collage What is a series? It is a group of pieces based on a common element or THEME. MUST HAVE 3-4 IMAGES. You can base a series on:
Read more about Kirby's photographs HERE
April 30th
Learning Objective: Students will create a final 'David Hockney collage project', using at least ten photographs in each of their two final images, focusing on editing techniques and skills to communicate an idea/concept within their work, before reflecting on their work using provided questions on google classroom, and then planning for their mini photography series project.
|


WARM UP: Take a look at this photo series project. Answer questions on Google Classroom and respond thoroughly in order to receive full credit!
|
May 3rd
Learning Objective: Students will work towards creating a mini photo series project, planning, taking images and reviewing tutorials on editing techniques and processes from this year, by exploring a thematic concept/unifying elements or subject matter, after completing a planning document and submitting on google classroom. |
In order for me to know who's on track and who needs extra help with this project, I need you to complete the planning sheet I've assigned on Google Classroom BY THE END OF CLASS TODAY.
|
May 6th
Learning Objective: Students will work towards creating a mini photo series project, planning, taking images and reviewing tutorials on editing techniques and processes from this year, by exploring a thematic concept/unifying elements or subject matter, after completing a planning document and submitting on google classroom.
Learning Objective: Students will work towards creating a mini photo series project, planning, taking images and reviewing tutorials on editing techniques and processes from this year, by exploring a thematic concept/unifying elements or subject matter, after completing a planning document and submitting on google classroom.
|
May 7th
Learning Objective: Students will work towards creating a mini photo series project, using appropriate editing techniques and processes from this year, and exploring a thematic concept/unifying elements or subject matter, before reflecting on their work using a written self-assessment and updating individual websites in preparation for a final website check next week. |
How to Check if you are 'Up-to Date' on ALL work
|
|
May 8th & 9th
Learning Objective: Students will continue working towards creating a mini photo series project, using appropriate editing techniques and processes from this year, and exploring a thematic concept/unifying elements or subject matter, before reflecting on their work using a written self-assessment and updating individual websites in preparation for a final website check next week. |
ARTS WALK IS TONIGHT!!!! 5:30 - 8 pm
To Earn Extra Credit: Take a selfie and either email it to me, or show it to me in class tomorrow. Your selfie MUST show YOU and the art show BEHIND YOU [email protected] |
|
May 10th
Learning Objective: Students will create a finished and finalized mini photo series project, using appropriate editing techniques and processes from this year, and exploring a thematic concept/unifying elements or subject matter, as well as a written self reflection and upload on google classroom, before updating individual websites in preparation for a final website check next week. May 13th
Learning Objective: Students will finalize individual websites, referring to the 'website checklist form' provided last week, and make sure all components are present in the website, before completing their 'portfolio' page and uploading a final reflection for the year. |
|
WEBSITES MUST BE COMPLETELY DONE AT THE END OF CLASS TOMORROW (TUESDAY)
- Refer to website checklist form and make sure all components are uploaded - Hit 'PUBLISH' often!
- On your 'Portfolio' Page:
- Add a NEW gallery and upload your SIX BEST photographs from semester 2 (you should already have a gallery with six photos from semester 1). YOU SHOULD HAVE TWELVE PHOTOS TOTAL ON YOUR PORTFOLIO PAGE.
- Artist Statement - PLEASE ADD THIS TO THE VERY TOP OF YOUR PORTFOLIO PAGE (above your twelve images)
- What kind of photographer are you? What themes, styles, and individual ideas have emerged often in your projects this year? (What do you want to say about your work to the people looking at it?)
- How have you grown as a photographer this year?
- What was your favorite project/assignment you created this year?
- What new techniques have you learned? What techniques would you like to continue to explore and utilize in the future?
- How will photography and/or what you have learned this year influence your future career/personal life?
- What do you want to learn more about (in the field of photography)?
May 14th
Learning Objective: Students will finalize individual websites, referring to the 'website checklist form' provided last week, and make sure all components are present in the website, before completing their 'portfolio' page and uploading a final reflection for the year.
Learning Objective: Students will finalize individual websites, referring to the 'website checklist form' provided last week, and make sure all components are present in the website, before completing their 'portfolio' page and uploading a final reflection for the year.
|
Websites need to be completed by tomorrow (I realize many of you are taking AP exams today) I will be grading them the rest of the week
Seniors: Please be prepared to showcase your website at the end of class today Tomorrow, Thursday, and Friday this week: We will be completing photo challenges! May 15th
Learning Objective: Students will participate in a photo challenge, taking images that meet the prompts below, and uploading into a contact sheet to turn in at the end of the period!

|
Website Presentation
Show off your Projects Page - what was your favorite project and why? Show off your Portfolio Page. Point out a few of your favorite images from this year - why are they your favorite? Show off your Personal Photography Page. What do you take photos of in your spare time? 
TURN IN YOUR CONTACT SHEET AT THE END OF THE PERIOD!
May 16th and 17th
Learning Objective: Students will participate in a second photo challenge at City Park, taking images that meet the prompts below, and uploading into a contact sheet to turn in at the end of the period!
|
TURN IN YOUR CONTACT SHEET AT THE END OF THE PERIOD!
|
May 20th
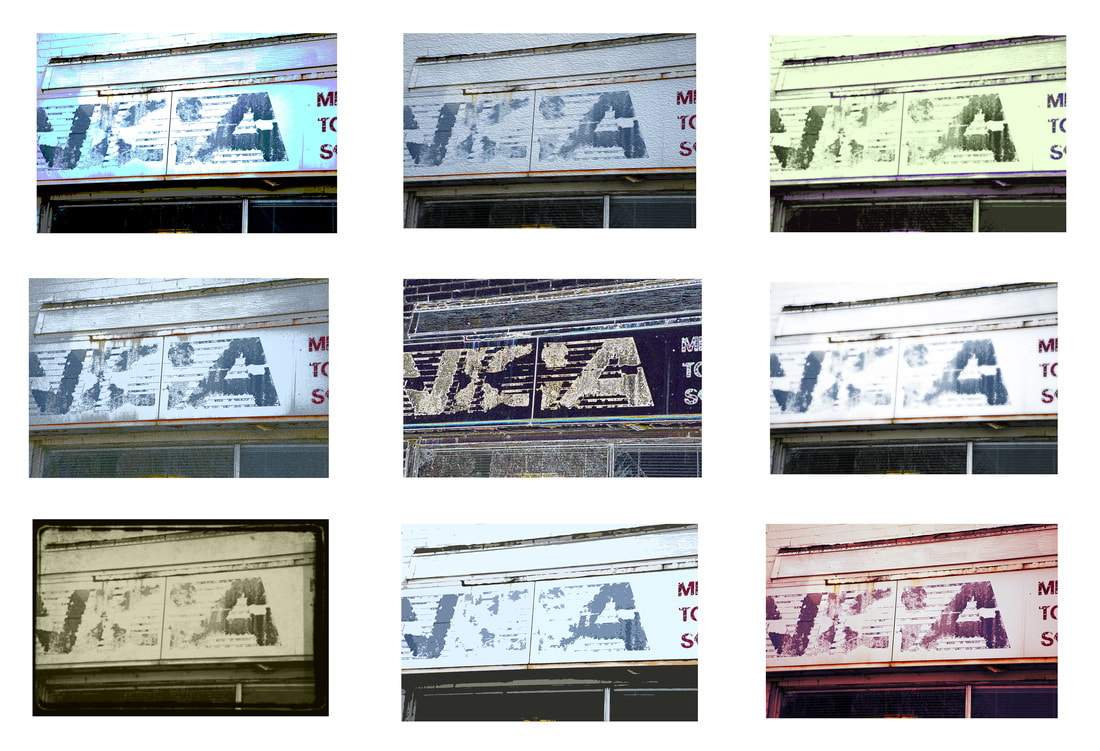
Learning Objective: Students will edit a photo from their photo challenge, creating a grid and utilizing nine filters/editing techniques of their choice. Take 1 image from your photo challenges and alter it 9 ways (filters, special effects). Make a grid of these 9 images. Tired of using photoshop? Try this: PIXLR There are many others out there. Also, you may want to explore some editing apps on your phone (try the free ones). TURN IN GRID BY THE END OF THE HOUR May 21st
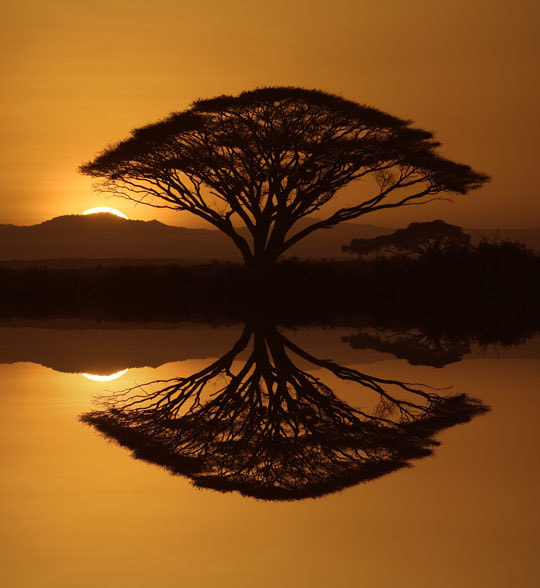
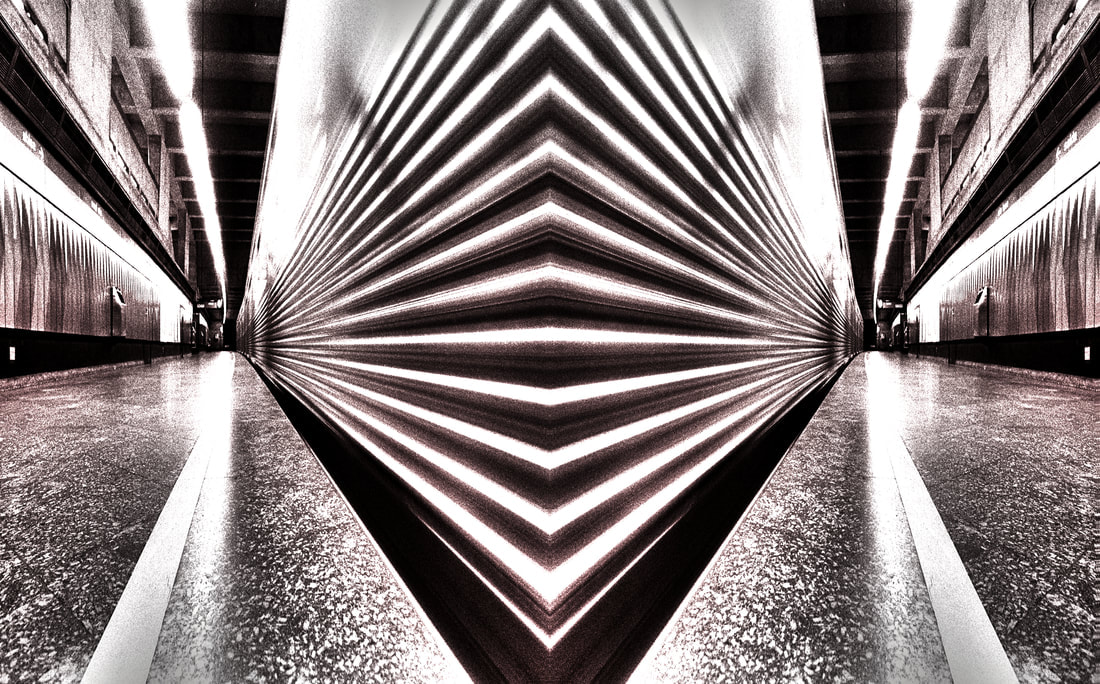
Learning Objective: Students will edit a photo of their choice from their photo challenges, and create a 'mirror effect' using photoshop editing techniques and step by step instructions from the provided tutorial. Please make sure the following has been done BEFORE the end of the day:
May 22nd and 23rd - LAST DAY FOR PHOTO CHALLENGES!
Learning Objective: Students will complete two photo challenges - Face Swap/Liquify AND a compound word challenge by editing through photoshop and submitting both on google classroom. DUE AT THE END OF THE HOUR. 
|
MIRROR TUTORIAL - Choose ONE image from the photo challenges last week
Click Here for Tutorial (text) Final exam/website presentations are:
Tuesday from 10:40-11:50 (7th hour) Wednesday from 8-9:10 (8th hour)
Example of a 'Compound Word' challenge project! |